How to implement MVVM pattern in Swift from scratch
Creating a new app often raise the question of what architecture to choose, which pattern would fit best. In this post, I show how to implement an MVVM pattern around a sample app in Swift.
The architecture of an app is always a subject that can drive developers crazy, mainly depending of everybody’s experience. This is also true for mobile app, iOS or Android: MVVM, MVC, MVP, VIPER, which one to choose?
There is already a lot of articles covering pros and cons of those patterns, I don’t think I can add anything to it. However, I’ve noticed that the best way for me to learn and challenge those patterns was to reimplement them often, like a coding routine.
In this article, I want to share how to implement an MVVM pattern around a currency converter app in Swift. My goal is to create a MVVM template from this sample iOS app that we can improve and reuse over the time. I used Foreign exchange rates and currency conversion API for an easy api to test, displaying latest exchange rates in a tableView.
Before diving in the code, here is a quick introduction to this pattern. MVVM stands for Model, View, ViewModel, a specific architecture pattern where the ViewModel stands between View and Model providing interfaces to imitate UI component. This connection is made by “binding” values, linking logical data to the UI.
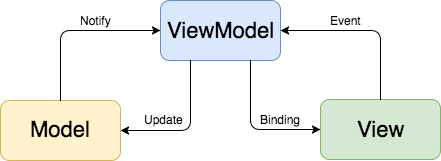
In an iOS app, the View element in this MVVM approach is often the UIViewController itself. The benefice of this approach is that the code becomes more modular, easier to maintain and test.
Let’s now get into the code.
Model
Matching with the api model, here is my two struct to start with.
struct CurrencyRate {
    let currencyIso : String
    let rate : Double
}

struct Converter {
    let base : String
    let date : String
    let rates : [CurrencyRate]
}
I also create a specific service to create an api request coupled with a parser protocol that my Converter implement. You can find those source code in the Github repo at the end of that article. This is not really MVVM related so I’ll move on straight to our ViewModel and the binding system.
ViewModel
First, to be able to bind values from our ViewModel to our View, we need element with an observable pattern. In iOS, we could use KVO pattern to add and remove observers, but I think we can do a bit better with “didSet” observer.
Let’s remember that we want to execute a specific code overtime that a value has changed. We can also assume that our object can have multiple observers that are waiting for updates.
To do so, I created a class keeping a dictionary of observers and their code (here a closure) that we want to execute when updated. Here what it looks like.
typealias CompletionHandler = (() -> Void)
class DynamicValue<T> {

    var value : T {
        didSet {
            self.notify()
        }
    }

    private var observers = [String: CompletionHandler]()

    init(_ value: T) {
        self.value = value
    }

    public func addObserver(_ observer: NSObject, completionHandler: @escaping CompletionHandler) {
        observers[observer.description] = completionHandler
    }

    public func addAndNotify(observer: NSObject, completionHandler: @escaping CompletionHandler) {
        self.addObserver(observer, completionHandler: completionHandler)
        self.notify()
    }

    private func notify() {
        observers.forEach({ $0.value() })
    }

    deinit {
        observers.removeAll()
    }
}
For my example, I wanted to separate the ViewModel to the data layer. For that reason, I create a generic dataSource that we can reuse regardless the data we would like to update.
class GenericDataSource<T> : NSObject {
    var data: DynamicValue<[T]> = DynamicValue([])
}
Now we can implement our ViewModel, able to fetch currency exchange rates and updating its dataSource once fetched. To make it safer and easier to test (by dependency injection), my CurrencyViewModel will not own the dataSource.
struct CurrencyViewModel {

    weak var dataSource : GenericDataSource<CurrencyRate>?

    init(dataSource : GenericDataSource<CurrencyRate>?) {
        self.dataSource = dataSource
    }

    func fetchCurrencies() {
        CurrencyService.shared.fetchConverter { result in

            DispatchQueue.main.async {
                switch result {
                case .success(let converter) :
                    // reload data
                    self.dataSource?.data.value = converter.rates

                    break
                case .failure(let error) :
                    print("Parser error \(error)")
                    break
                }
            }
        }
    }
}
On the other side, let’s create our dataSource that would be binding to our view.
class CurrencyDataSource : GenericDataSource<CurrencyRate>, UITableViewDataSource {

    func numberOfSections(in tableView: UITableView) -> Int {
        return 1
    }

    func tableView(_ tableView: UITableView, numberOfRowsInSection section: Int) -> Int {
        return data.value.count
    }

    func tableView(_ tableView: UITableView, cellForRowAt indexPath: IndexPath) -> UITableViewCell {

        let cell = tableView.dequeueReusableCell(withIdentifier: "CurrencyCell", for: indexPath) as! CurrencyCell

        let currencyRate = self.data.value[indexPath.row]
        cell.currencyRate = currencyRate

        return cell
    }
}
As a reminder, the main reason I separated my CurrencyViewModel of my CurrencyDataSource is that your ViewModel should never be aware of its View it is binding to. By implementing UITableViewDataSource, I felt it was too close to it, so I separated in another class: CurrencyDataSource
If tomorrow, you want to change the UI for a UICollectionView, the ViewModel wouldn’t need to be update, we would have a great separation of concern.
View
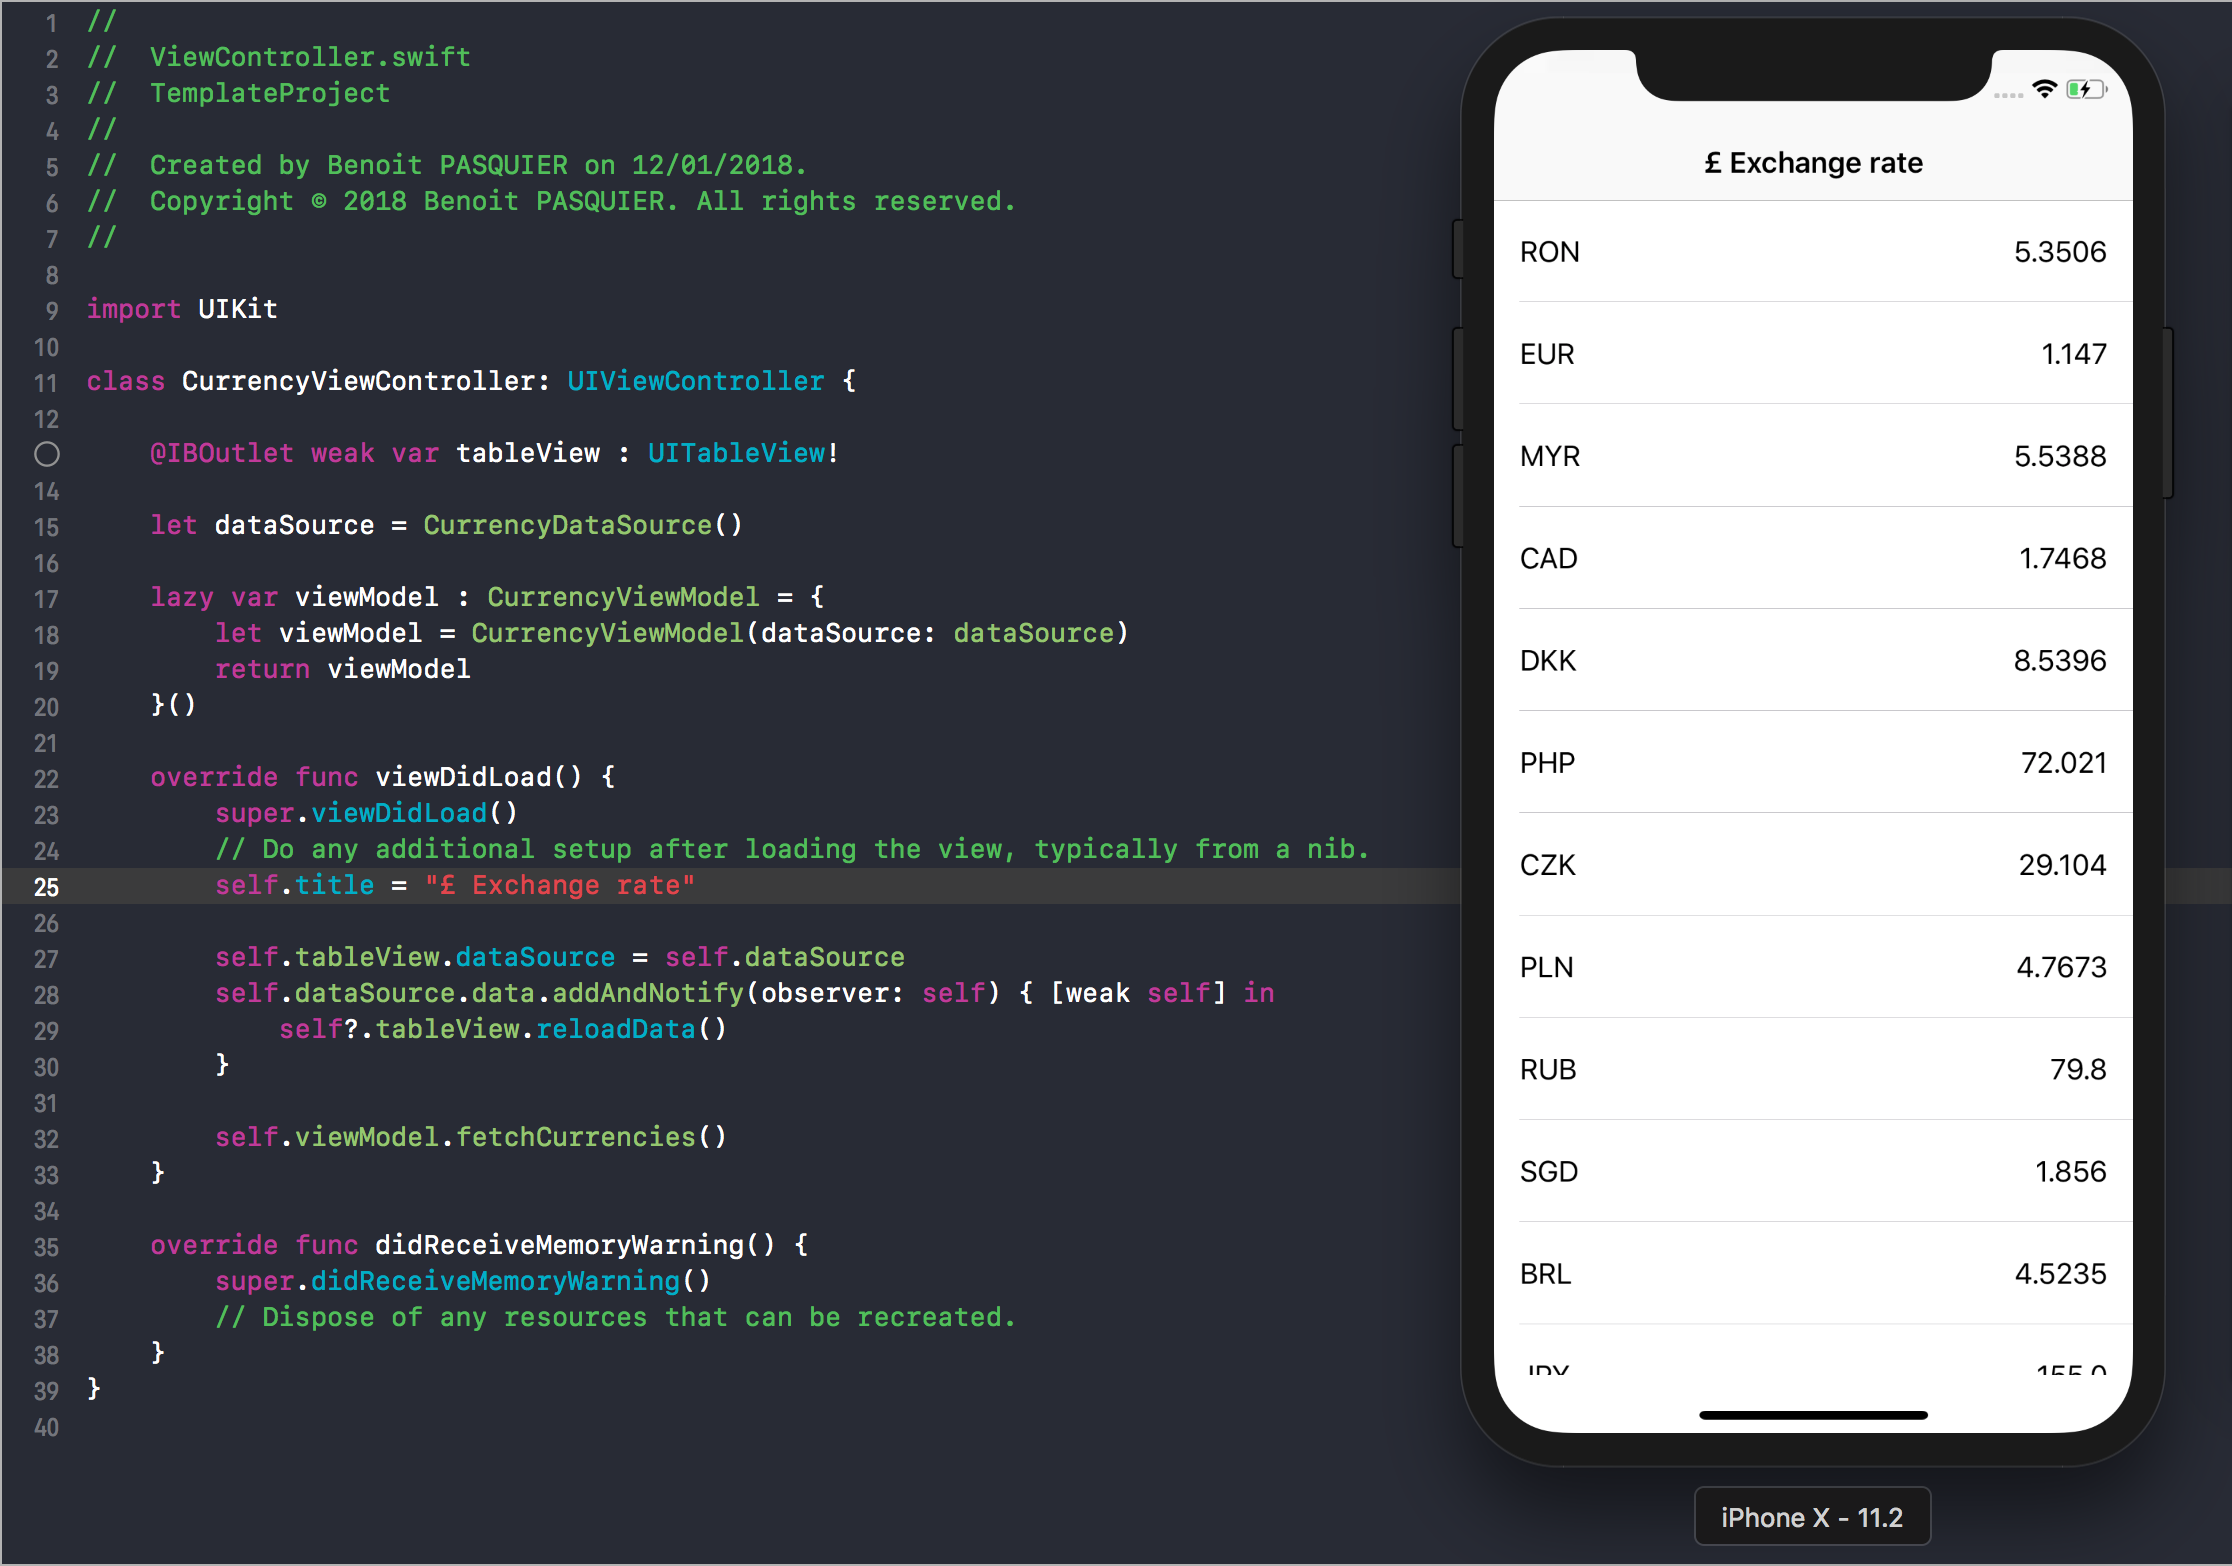
Finally, let’s implement our View, which is our CurrencyViewController. What’s need to be done there is to link a UITableView to its dataSource, but also to bind values to be able to automatically refresh the UI when new data is available
class CurrencyViewController: UIViewController {

    @IBOutlet weak var tableView : UITableView!

    let dataSource = CurrencyDataSource()

    lazy var viewModel : CurrencyViewModel = {
        let viewModel = CurrencyViewModel(dataSource: dataSource)
        return viewModel
    }()

    override func viewDidLoad() {
        super.viewDidLoad()
        self.title = "£ Exchange rate"

        self.tableView.dataSource = self.dataSource
        self.dataSource.data.addAndNotify(observer: self) { [weak self] in
            self?.tableView.reloadData()
        }

        self.viewModel.fetchCurrencies()
    }

    override func didReceiveMemoryWarning() {
        super.didReceiveMemoryWarning()
        // Dispose of any resources that can be recreated.
    }
}
Another trick here is that by using addAndNotify the observer is added and updated at the same time, our tableView will be reloaded, therefore our UI will be built at the first launch even without data.
In conclusion, we finally have our MVVM approach completed: each layer is separated, making it easier to use, to maintain and to test. It’s also more readable, our files are made of 50 lines of code in average.
I omitted some bits in this post that I didn’t feel it was fully relevant to the pattern itself, like my services to handle api request, parse and handle exceptions. This whole sample iOS app is available on Github.
At the end, I believe that testing and challenging patterns are the best way to make your own idea of it. It’s a good way to be more confident in your code. On the other hand, I wouldn’t rely on one solution only, ignoring alternatives, that is also why I created that template: I can reuse and rethink of it as soon as a new project popped in my mind.
Where to go from here
- SwiftUI - What has changed in your MVVM pattern implementation
- Unit Testing your MVVM architecture in Swift
- Error handling in MVVM architecture in Swift
Extra resources