SwiftUI - What has changed in your MVVM pattern implementation
Introduced in 2019, Apple made UI implementation much simpler with With SwiftUI its UI declarative framework. After some time experiencing with it, I’m wondering today if MVVM is still the best pattern to use with. Let’s see what has changed, implementing MVVM with SwiftUI.
Prerequisite
Before starting, if you are not too familiar with MVVM pattern, you can have a look how it works. This article relies on the sample example I used two years ago: building a currency exchange app but using SwiftUI this time. Let see what to keep and what to clean.
Starting with the model layer, I realized a lot has changed in the last two years. I could get rid of previous JSON parsing and custom Result to use the latest available one in Swift.
enum CurrencySymbol: String {
    case GBP, USD, EUR

    var symbol: String {
        switch self {
        case .EUR: return "€"
        case .USD: return "$"
        case .GBP: return "£"
        }
    }
}

struct Currency {
    let iso: String
    let rate: Double
}

struct Converter {
    let base: String
    let date: String
    var currencies: [Currency]

    var baseSymbol: String? {
        CurrencySymbol(rawValue: base.uppercased())?.symbol
    }
}
The only tweak I had to do is when decoding JSON. I reimplementing the Decodable protocol due to the specificity of the api previously used.
extension Converter: Decodable {

    init(from decoder: Decoder) throws {

        let container = try decoder.container(keyedBy: Keys.self)
        let base = try container.decode(String.self, forKey: .base)
        let date = try container.decode(String.self, forKey: .date)
        let currencies = try container.decode([String: Double].self, forKey: .rates)
            .compactMap({ Currency(iso: $0.0, rate: $0.1) })

        self.init(base: base, date: date, currencies: currencies)
    }

    enum Keys: String, CodingKey {
        case base
        case date
        case rates
    }
}
Note: the main change was to capture key and value when decoding currency. It’s something I learn we can do with [String:Double].self.
Moving on to the api layer (where the data comes from), the protocol hasn’t changed much neither. The key change is to make it observable with Combine framework.
I also chose to use a sample file, making it easier to test, the interesting bit would be the SwiftUI anyway.
import Combine

protocol CurrencyServiceProtocol {
    func converter(basedOn currencyIso: String) -> AnyPublisher<Converter,Error>
}

struct FileCurrencyService: CurrencyServiceProtocol {

    private let fileName = "sample"

    func converter(basedOn currencyIso: String) -> AnyPublisher<Converter, Error> {
        return FileManager.readJsonFile(from: fileName)
            .tryCompactMap { data -> Converter in
                let jsonDecoder = JSONDecoder()
                return try jsonDecoder.decode(Converter.self, from: data)
            }
            .eraseToAnyPublisher()
    }
}
We updated our models and services, we are finally good to go and move on to the MVVM side, starting with the ViewModel.
ViewModel
Since the app meant to list multiple currency rates, I started with the item representing each row in the list.
import Combine

class CurrencyItemViewModel: ObservableObject, Identifiable {

    @Published var title: String = ""
    @Published var value: String = ""

    init(currency: Currency) {
        title = currency.iso
        value = "\(currency.rate)"
    }
}
This class looks like any others. The key element is to make the class ObservableObject for the view component to observe its changed and published content.
The second part is Identifiable that creates an id property that will be used to identify which element for each row. This is how SwiftUI knows which row to update accord the element identified.
Now we’ve got the item foreach row, we can get to the listing part.
class CurrenciesListViewModel: ObservableObject, Identifiable {

    @Published var rates: [CurrencyItemViewModel] = []
    @Published var title: String = ""

    private let converterService: CurrencyServiceProtocol
    private var disposables = Set<AnyCancellable>()

    init(converterService: CurrencyServiceProtocol) {
        self.converterService = converterService

        fetchCurrencies()
    }

    func fetchCurrencies(for currencyIso: String = "GBP") {
         ...
    }
The idea is very similar: I created first the elements I want to expose to SwiftUI: here the title and the list of items. I also used dependency injection to be able to fetch currencies, regardless what type of element implement it.
The last element implemented is disposables. This is be used to store canceallable observable object that will be free once their object is not need anymore. It’s quite similar to disposeBag in RxSwift world.
Finally, we can implement our method to populate our currencies
func fetchCurrencies(for currencyIso: String = "GBP") {

    converterService
        .converter(basedOn: currencyIso)
        .sink(receiveCompletion: { [weak self] value in
            guard let self = self else { return }
            switch value {
            case .failure:
                self.rates = []
                self.title = "Currency Exchange"
            case .finished:
                break
            }
        }, receiveValue: { [weak self] converter in
            guard let self = self else { return }
            self.rates = converter.currencies
                .sorted(by: { (left, right) -> Bool in
                    left.iso < right.iso
                })
                .map({ CurrencyItemViewModel(currency: $0) })

            if let symbol = converter.baseSymbol {
                self.title = "Currency Exchange \(symbol)"
            }
        })
        .store(in: &disposables)
}
The idea is to get currencies rate for a specific currency (theoretically, but since we use a file, this is ignored earlier), capture any errors or finish states that could be trigger, or capture new value separately.
When receiving a new value, I sort currency rate alphabetically, then build an item ViewModel for it. This bit could have been integrated separately, but this is app is very small, so I kept it simple.
Each observable elements is populated when needed, we can finalize the app with the view.
View
Starting with the item representing each row, I only needed two labels (here Text) and some space between them, all together aligned horizontally.
import SwiftUI

struct CurrencyItemView: View {

    @ObservedObject var viewModel: CurrencyItemViewModel

    init(viewModel: CurrencyItemViewModel) {
        self.viewModel = viewModel
    }

    var body: some View {
        HStack {
            Text(viewModel.title)
            Spacer()
            Text(viewModel.value)
        }
    }
}
Note: to make sure it works, the viewModel has to use @ObservedObject to be automatically binded to it and get trigger for any new changes.
That’s it, this is where I realized how simple SwiftUI. No need specific UITableViewCell, no IBOutlet, no interface builder binding. I just passed element straight to the view.
Moving on to the listing page.
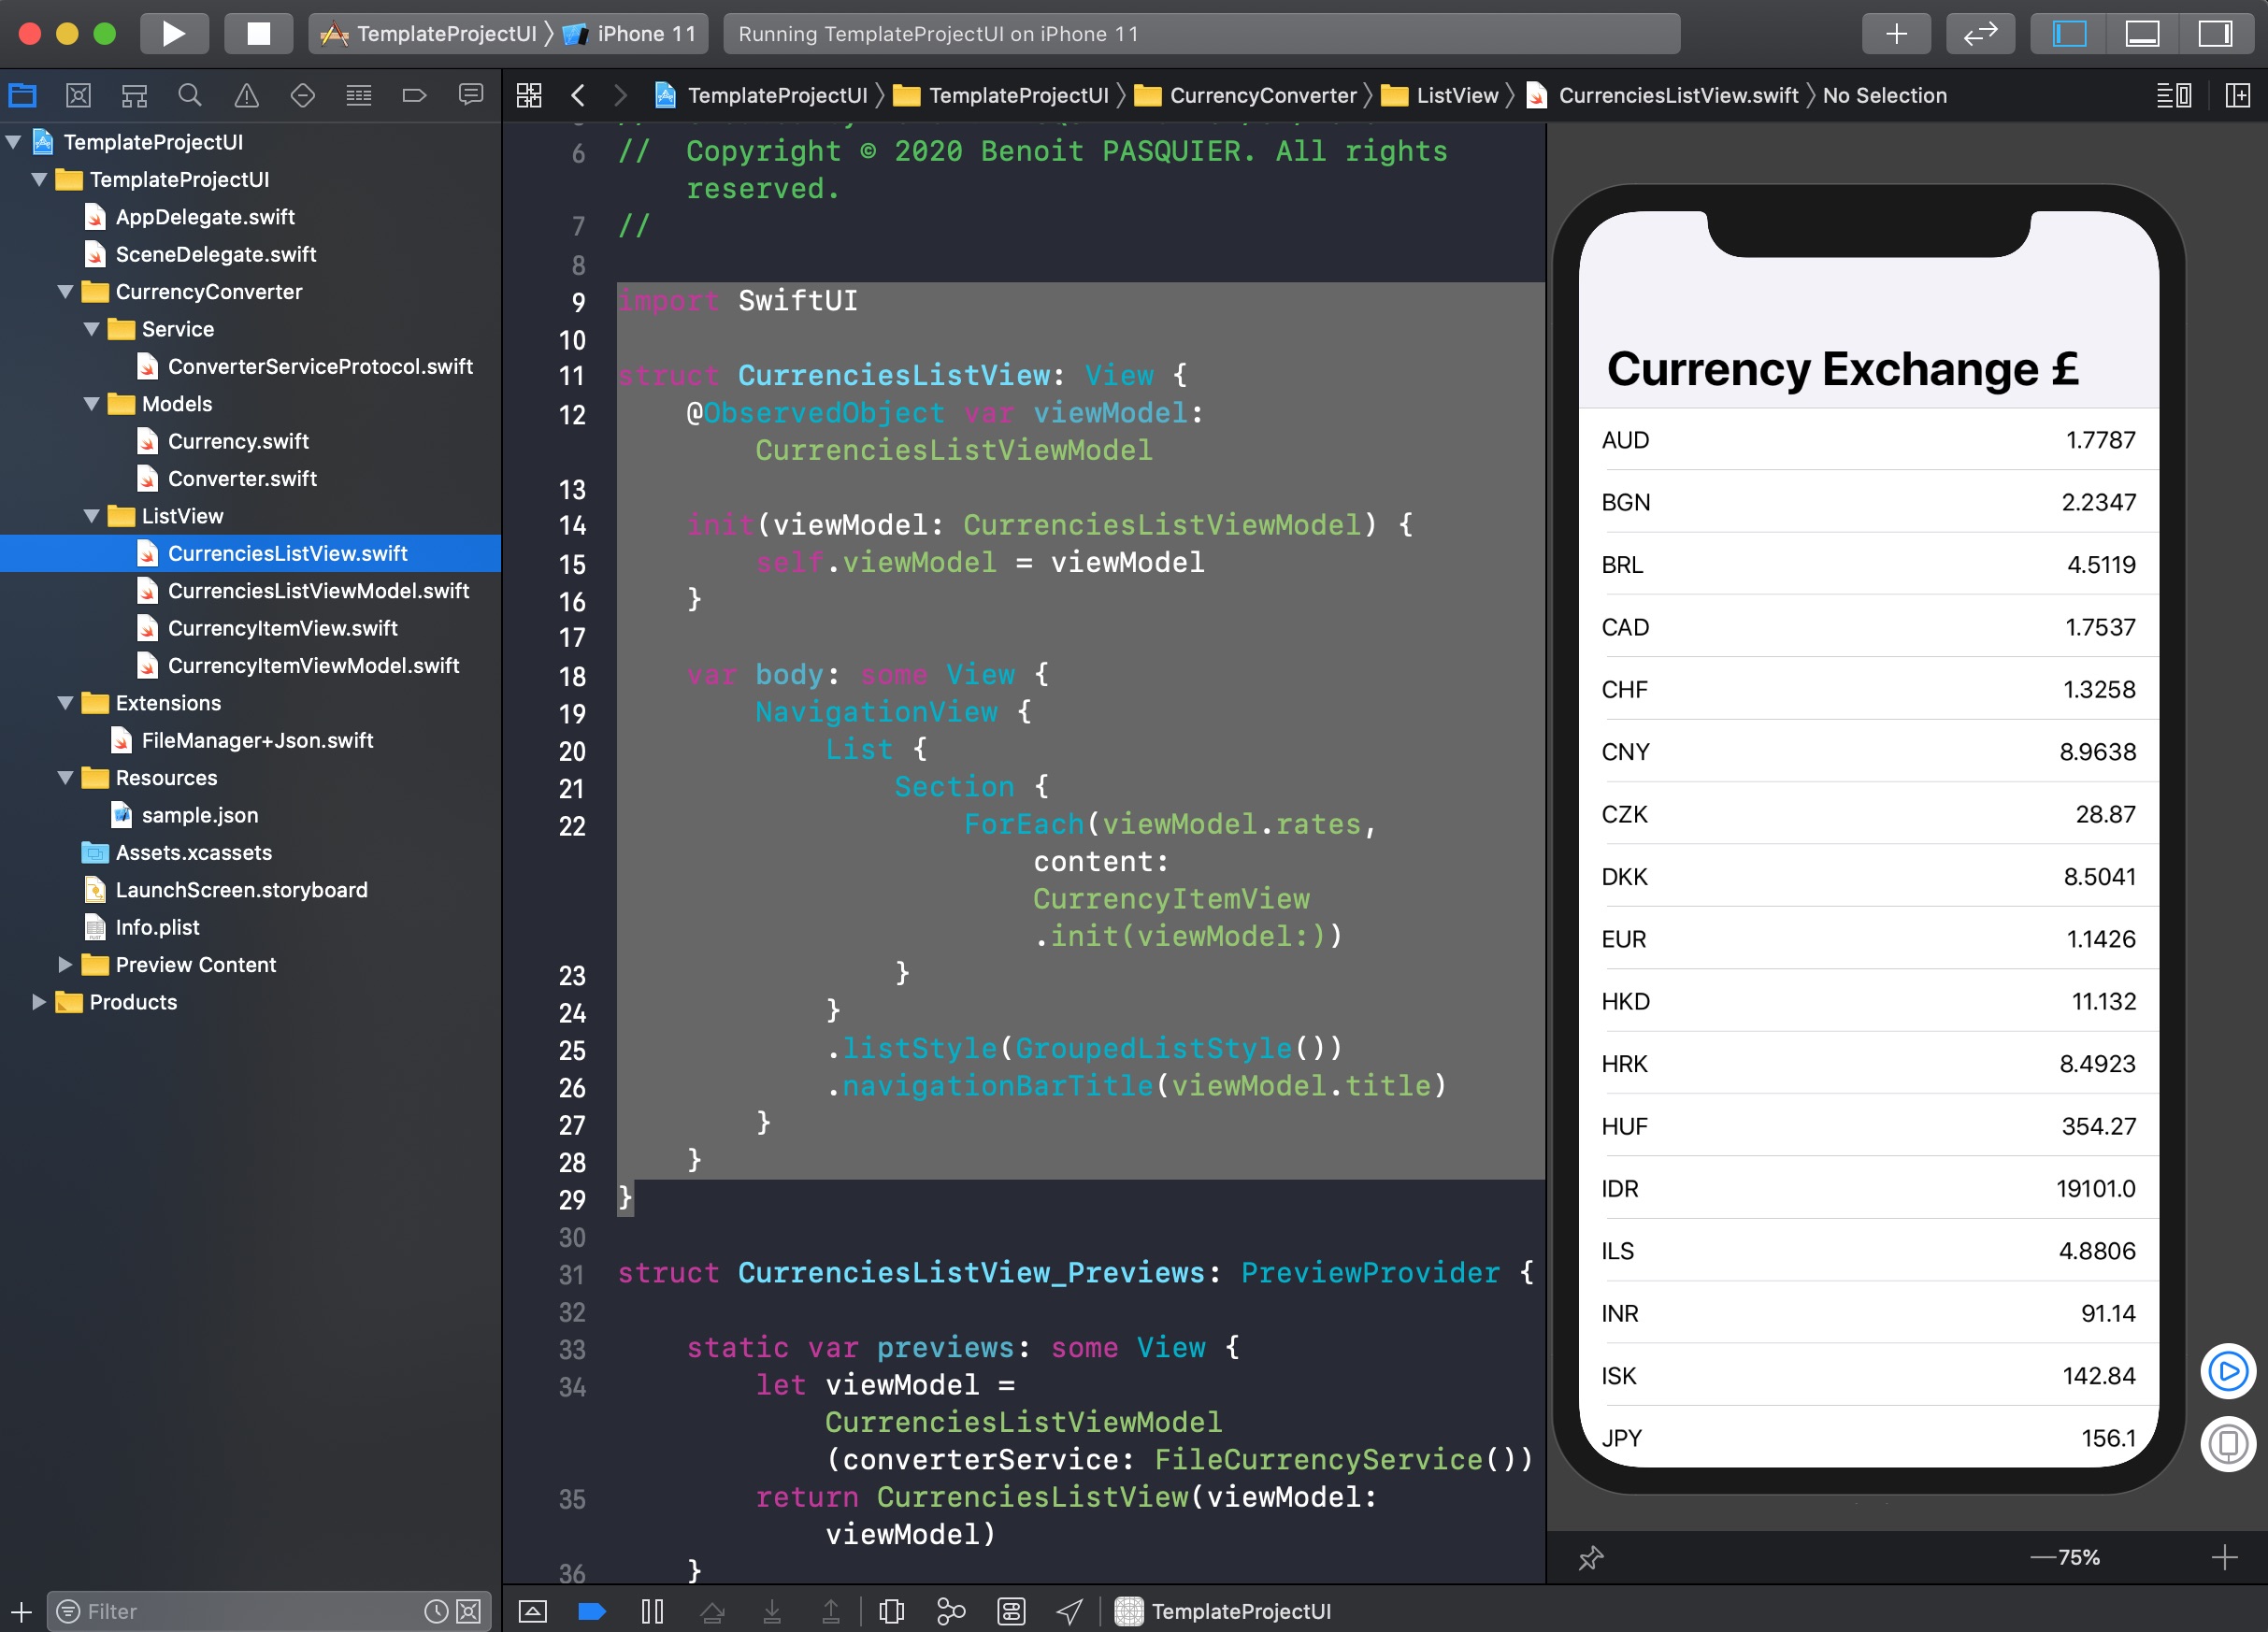
import SwiftUI

struct CurrenciesListView: View {
    @ObservedObject var viewModel: CurrenciesListViewModel

    init(viewModel: CurrenciesListViewModel) {
        self.viewModel = viewModel
    }

    var body: some View {
        NavigationView {
            List {
                Section {
                    ForEach(viewModel.rates, content: CurrencyItemView.init(viewModel:))
                }
            }
            .listStyle(GroupedListStyle())
            .navigationBarTitle(viewModel.title)
        }
    }
}
Again, really simple. I used a list with one section where it builds a row with CurrencyItemView foreach CurrencyItemViewModel matched. I used a NavigationView to have a decent way to implement my title using tha navigation bar, but that’s about it.
Compared to UIKit, we saved ourselves from UITableView, its delegate, datasource and everything that it comes with it. It felt much cleaner and lighter to my previous implementation.
With all those details, we saw how easy it to implement MVVM pattern with SwiftUI. What’s even more interesting is that SwiftUI made any MV(C/VM/P) pattern easy.
If you think about it, MVVM pattern was one answer to fix the naive implementation of MVC where everything was implemented in the UIViewController, creating massive files really hard to maintain. But with SwiftUI, Apple puts an end to UIViewController while making it so easy to reuse any View type.
In short, as long as you don’t implement any heavy logic in your SwiftUI View like we tended to do in UIViewController before, then any MV(X) pattern can do it.
Let’s not get scared of legacy pattern “because others said so”. The new UI declarative framework makes it obvious to create a separate element to bind to, regardless how you want to name it (ViewModel, Controller, Presenter, …). Going further, SwiftUI becomes a perfect candidate to many other patterns. As long as the code stays easy to test and respect other best practices, you’ll be fine.
This project is available on Github here.
Happy coding