Advanced testing tips in Xcode
In the last couple years, Apple has made some good efforts to improve their testing tools. Today, I’ll walk you through some tips to make sure your test suite run at their best capacity.
Project configuration and testing environment
If you haven’t added yet some unit tests in your app, the first step is to create a testing bundle. You can add it when creating a project, or later on from your Xcode project file. From there, there is couple ways to organize your tests and configure how to run them.
One way is to create a specific scheme that will run those tests only. To do so, after creating a scheme, under Edit Scheme > Tests > Info, you can enable and disable your tests accordingly. This quickly allow me to switch to that target and run all the tests for my models for instance, or I could organize it by feature and unit test a specific one.
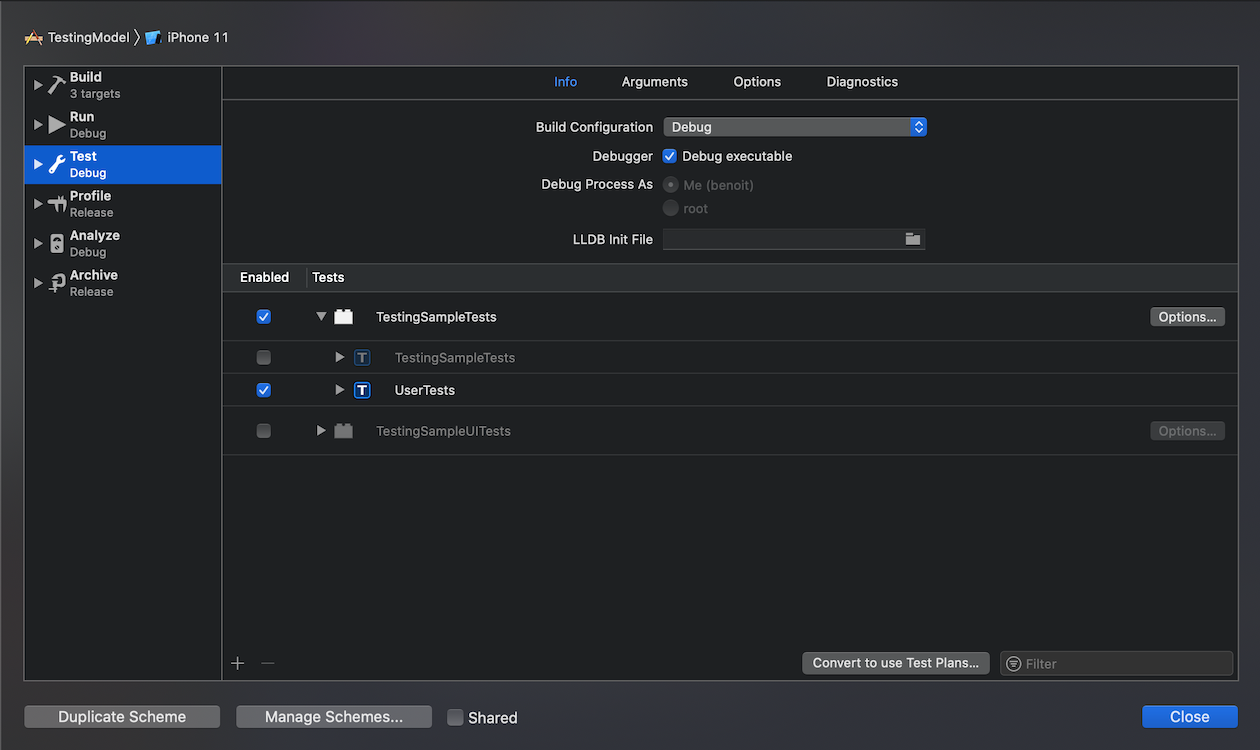
However, if you contribute to a medium / large project and you have already reached more than 300 tests, it gets really difficult to navigate under a scheme to know what is selected and what is not.
Another way is to create a separate bundle for each of you test suite. After all, this is how we separate unit testing and UI testing, so why not going through that lane?
One the paper that sounds like a good idea, it allows you more flexibility on each of them to configure and run. However, it can be hard to remember each config after a while. Would you remember which target was the original after duplicating it more than 3 times? Also each target comes with a lot of files, it can get quite messy in your repository.
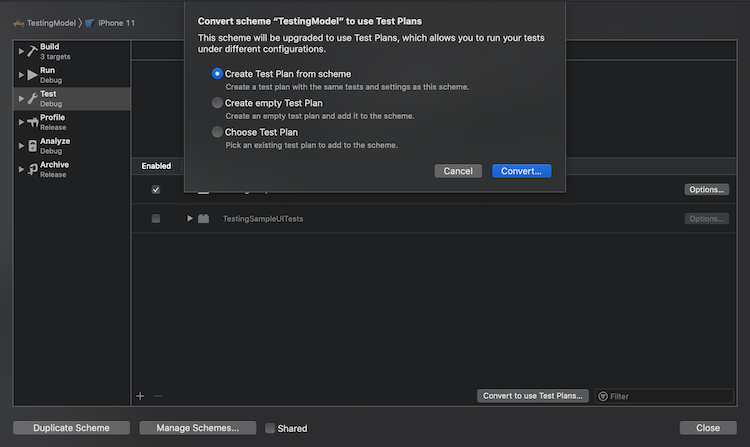
This is where Apple introduced Test Plan, a configuration tool to organize your testing suite. Other than make it easier to navigate through your tests, it also allow you to setup specific configuration for it, like Application Language or Application Region and setup a predefined environment. To convert a scheme into a test plan, you’ll only need to click “Convert to use Test Plans”.
Going further, you can add a Code Coverage, but also some optimization tools like Thread Sanitizer or Address Sanitizer to monitor behavior of your code.
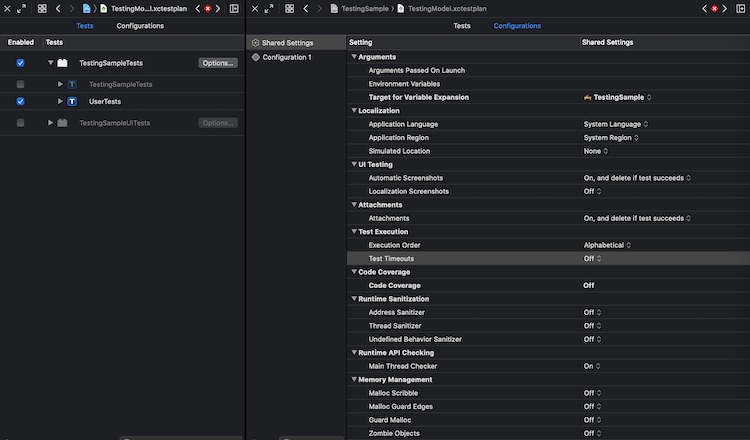
Finally, you can easily include arguments passed on launch or environment variables to create extra customization for your app. It’s a great tool. The only feature missing in my opinion is a search field to quickly filter tests and maybe enable / disable tests based on folder rather than one by one.
Skipping tests
With more code being shared between iOS and macOS, you might want to skip some tests that are using platform specific api. Introduced in Xcode 11.4, it turns to be really simple with XCTSkip methods.
XCTSkip is built similarly to an error to throw when testing. You’ll need to use specific test condition with XCTSkipIf() or XCTSkipUnless() to make the most of it and skip tests when the environment isn’t matching it.
func testSomethingInLatestiOS() throws {
    guard #available(iOS 14.0, *) else {
        throw XCTSkip("This test is designed for latest iOS api only.")
    }
    // ...
}

func testSomethingNotOnTV() throws {
    // skip when expression is true
    try XCTSkipIf(UIDevice.current.userInterfaceIdiom != .tv, "This test is not designed for tv")
    // ...
}

func testSomethingOnTablet() throws {
    // skip when expression is false
    try XCTSkipUnless(UIDevice.current.userInterfaceIdiom == .pad, "This test is designed for iPad")
    // ...
}
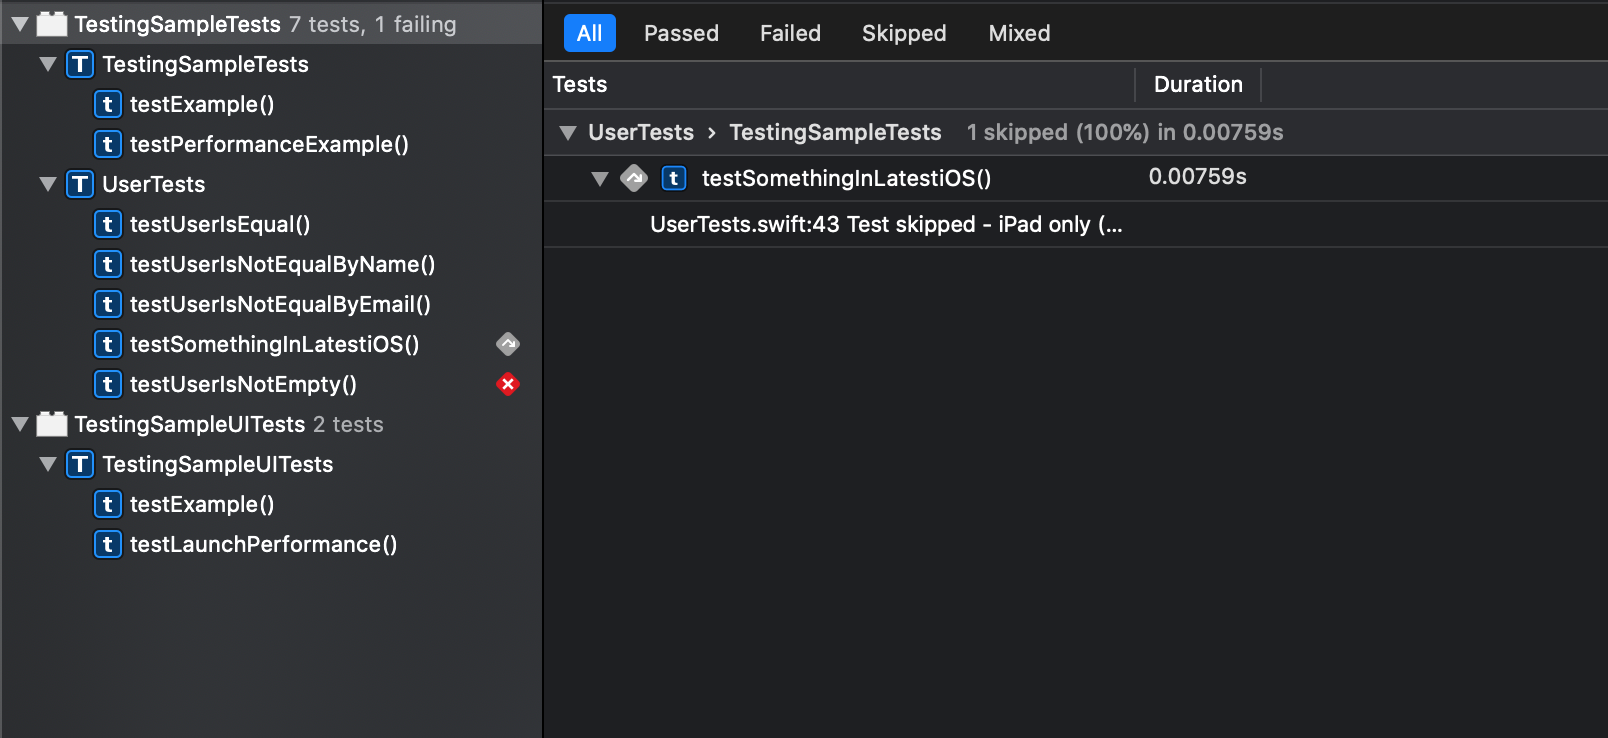
This will be highlighted with a different icon ⤵️ compare to ✅ succeed and ❌ failing one in your report.
Get faster test report
You might have experienced tests that hanged. It can happens for different reasons, like a busy main thread, an async request or a deadlock unhandled. If you didn’t have a timeout block for those expectations, you might hang for a while.
Introduced in Xcode 11.4, you can now setup a timeout for your all test suite. By enabling test timeout in your suite (or with -test-timeouts-enabled YES via xcodebuild), you can customize each XCTestCase execution time allowance before it stops, reset the timer and move to the next test. By default, the value is 600sec (or 10min) and would be round to the closest minute, 60sec being the minimum.
class UserTests: XCTestCase {

    override func setUp() {
        executionTimeAllowance = 60
        continueAfterFailure = true
    }

    // ...
}
In Xcode 12, Xcode provides a Default Test Execution Time Allowance -default-test-execution-time-allowance <sec> for the all test plan rather than putting in manually in each file. However, you don’t want to let developers set an unreasonable time, it’s also something you can enforce setting up a Maximum Test Execution Time Allowance -maximum-test-execution-time-allowance <sec> that will make sure the test doesn’t take more than the specified time regardless of XCTestCase or test plan config.
Run tests in parallel
In general, we tend to run tests in a serial order, one after another. However it can takes a while to go through the whole suite, especially if you have UI tests.
Running tests in parallel using multiple devices can improve the testing time by 30%. You can enable it through the test plan or using xcodebuild -parallel-testing-enabled YES -parallelize-tests-among-destination.
However, if you do so, you might want to consider couple things.
- Testing UI, you should use same device / OS specification when possible to avoid failing or skipping test due to a missing api or capability.
- Using different type of device or OS version make sense to test code that isn’t affected by the environment, like a framework or package covering a business logic.
Finally the tests are allocated per file per device. For my example, all my tests in UserTests would be run on same device, they are split between devices.
Understanding failing tests
When some code is reuse, a nice way to handle failing tests in Xcode is to throw the condition back to the caller.
func testUserIsNotEmpty() throws {
    let user = User(name: "", email: "")
    try assertNotEmpty(user) // this test is failing
}

func assertNotEmpty(_ user: User) throws {
    XCTAssertFalse(user.name.isEmpty)
    XCTAssertFalse(user.email.isEmpty)
}
If you run this before Xcode 12, it would actually fails in assetNotEmpty(...) but now, the error is now aligned to the caller testUserIsNotEmpty().
At the same time, any failing test passes an XCTIssue that includes the call stack and other useful attachments to it. This will be part of the test report.
It’s something you can observe using record(...) method if you want to include attachment or silent failing one (which I discourage, it’s probably better disabling it from the suite).
class UserTests: XCTestCase {
    func record(_ issue: XCTIssue) {
        // do something with the issue

        // let issue escalating
        super.record(issue)
    }
}
In conclusion, we saw how to configure and organize our test suite and environment and how to speed up the testing. We also got a good look how to skip and triage specific tests to make sure the suite is relevant to us.
These improvements make Xcode a much better environment to test and understand when something goes wrong. It’s a really great effort to improve developer experience.
This sample project are available on Github.