Creating a webcam utility app for macOS in SwiftUI
Did you ever have to share your screen and camera together? I recently did and it was that easy. How hard could it be to create our own? Today, we’ll code our own webcam utility app for macOS in SwiftUI.
I recently got chance to be part of my first online tech conference where I shared about Localization in SwiftUI. During the couple months prior to the event, I spent my free time recording myself going through code sharing session and slides.
One of my problem in this pre-recorded format was to keep a “miniature” of my camera in a corner of the screen. Today, we’ll code our own utility camera app for macOS in SwiftUI.
When I google how to record my screen as well as my webcam on macOS, most of tutorials point to QuickTime Player, keeping a window in a corner of the screen. If this worked fairly decently, it gets tricky if the cursor goes over the player window during the presentation. Also the shape of the player is limited to its window, it has to be a square.
Then I started wondering how hard it would be to create a small utility app to improve this.
Since I recently explored how to use AVFoundation with SwiftUI on iOS, I thought it would be similar enough to reuse for a macOS app version. After all the webcam of a laptop is just another video feed.
First part of the code is to adapt my previous PlayerView with a NSView to display a capture video layer. This time, the view won’t hold to the AVPlayer but to an AVCaptureVideoPreviewLayer, to be able to create the preview of the camera feed.
class PlayerView: NSView {

    var previewLayer: AVCaptureVideoPreviewLayer?

    init(captureSession: AVCaptureSession) {
        previewLayer = AVCaptureVideoPreviewLayer(session: captureSession)
        super.init(frame: .zero)

        setupLayer()
    }

    func setupLayer() {

        previewLayer?.frame = self.frame
        previewLayer?.contentsGravity = .resizeAspectFill
        previewLayer?.videoGravity = .resizeAspectFill
        previewLayer?.connection?.automaticallyAdjustsVideoMirroring = false
        layer = previewLayer
    }

    required init?(coder: NSCoder) {
        fatalError("init(coder:) has not been implemented")
    }
}
So far so good. Next step is to bring this view to the SwiftUI world.
final class PlayerContainerView: NSViewRepresentable {
    typealias NSViewType = PlayerView

    let captureSession: AVCaptureSession

    init(captureSession: AVCaptureSession) {
        self.captureSession = captureSession
    }

    func makeNSView(context: Context) -> PlayerView {
        return PlayerView(captureSession: captureSession)
    }

    func updateNSView(_ nsView: PlayerView, context: Context) { }
}
The PlayerContainerView is here only to wrap the player into a View type, so that we can incorporate it into SwiftUI. The capture session is passed through the layers to be able to display the camera feed.
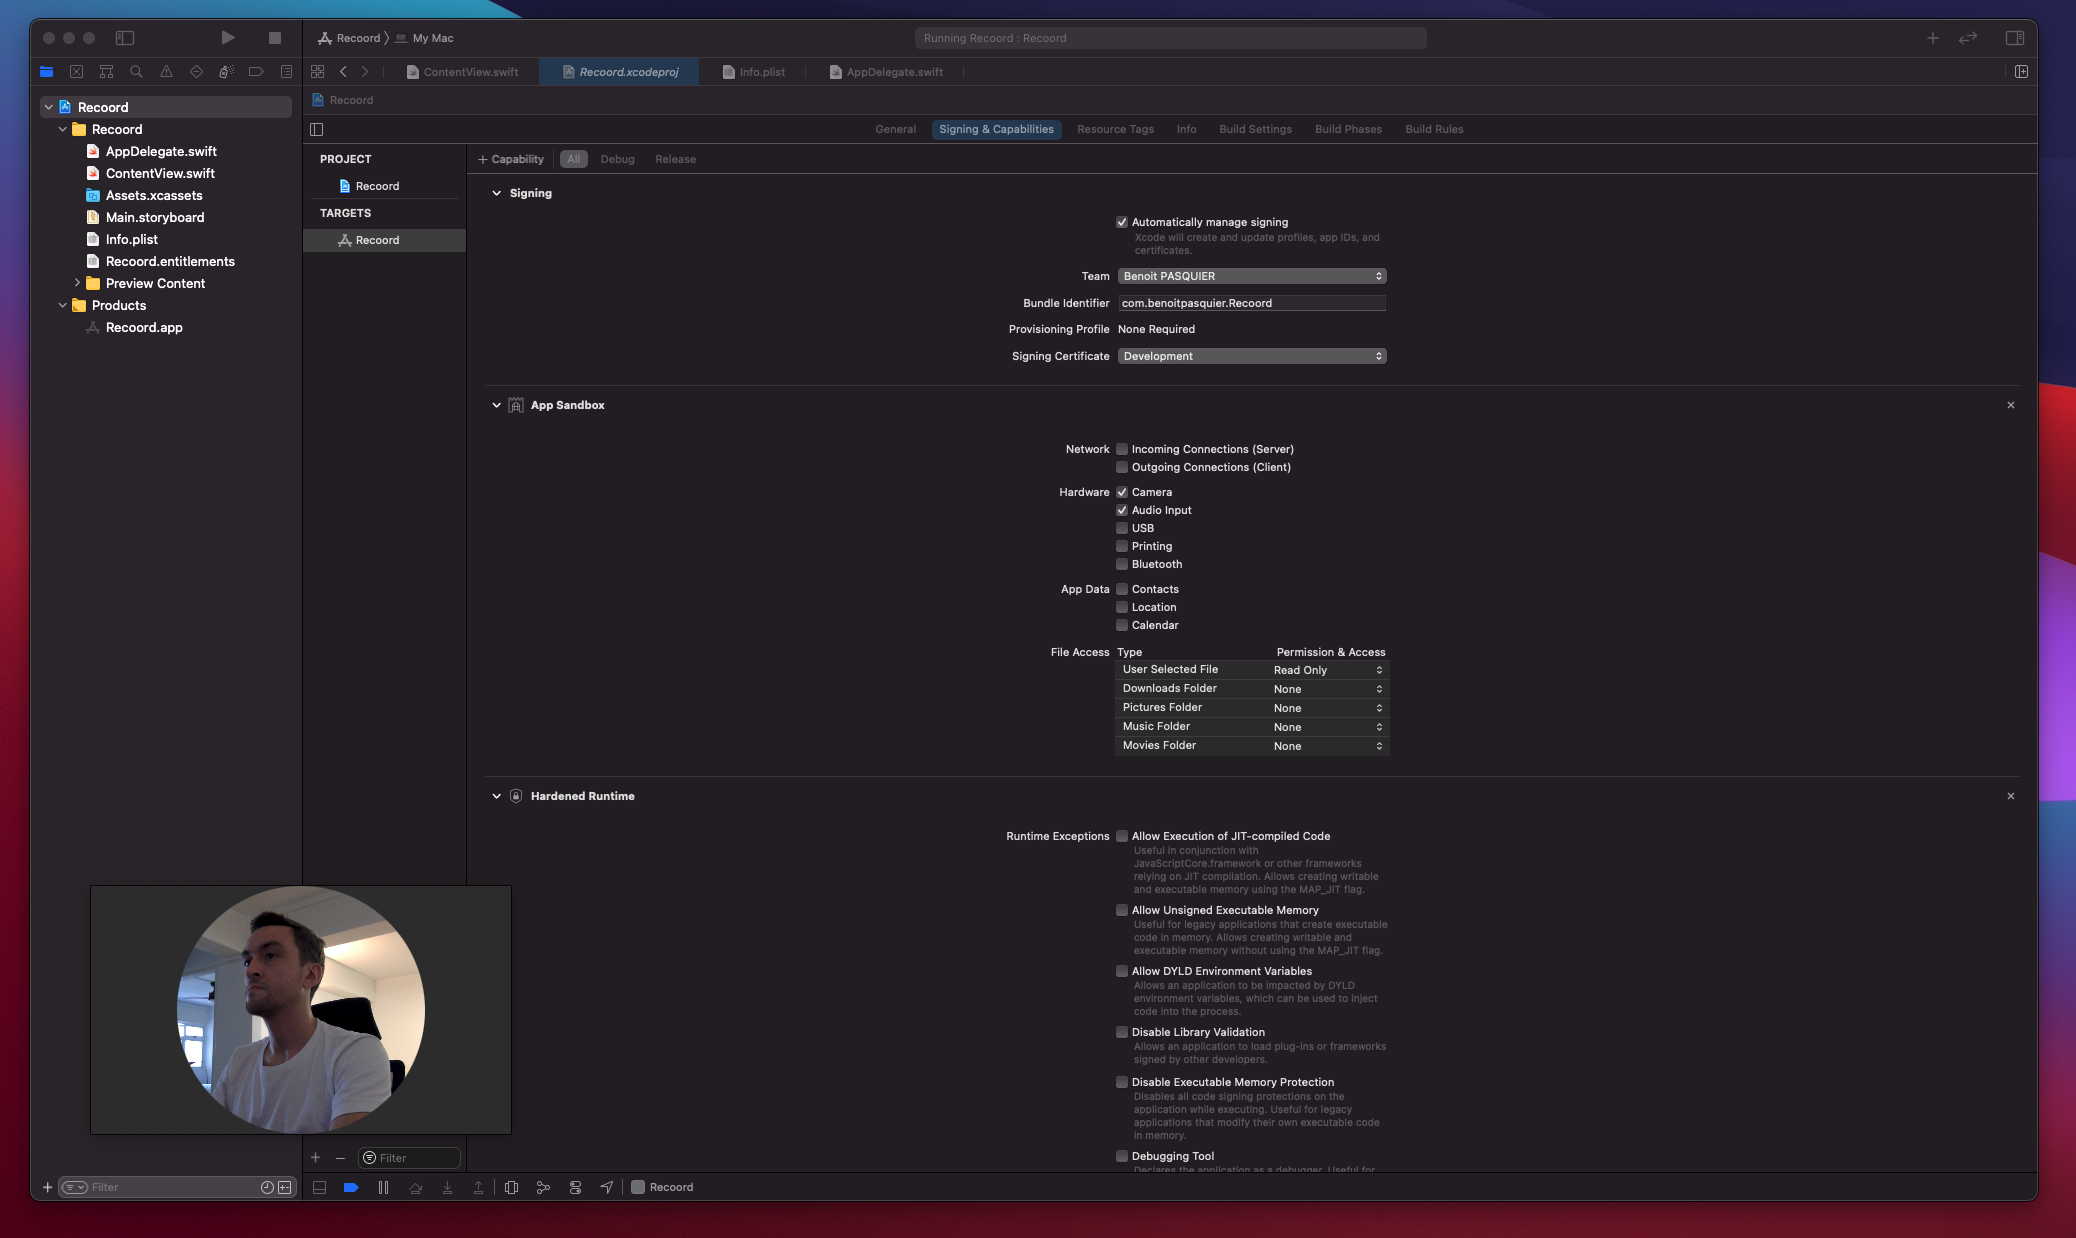
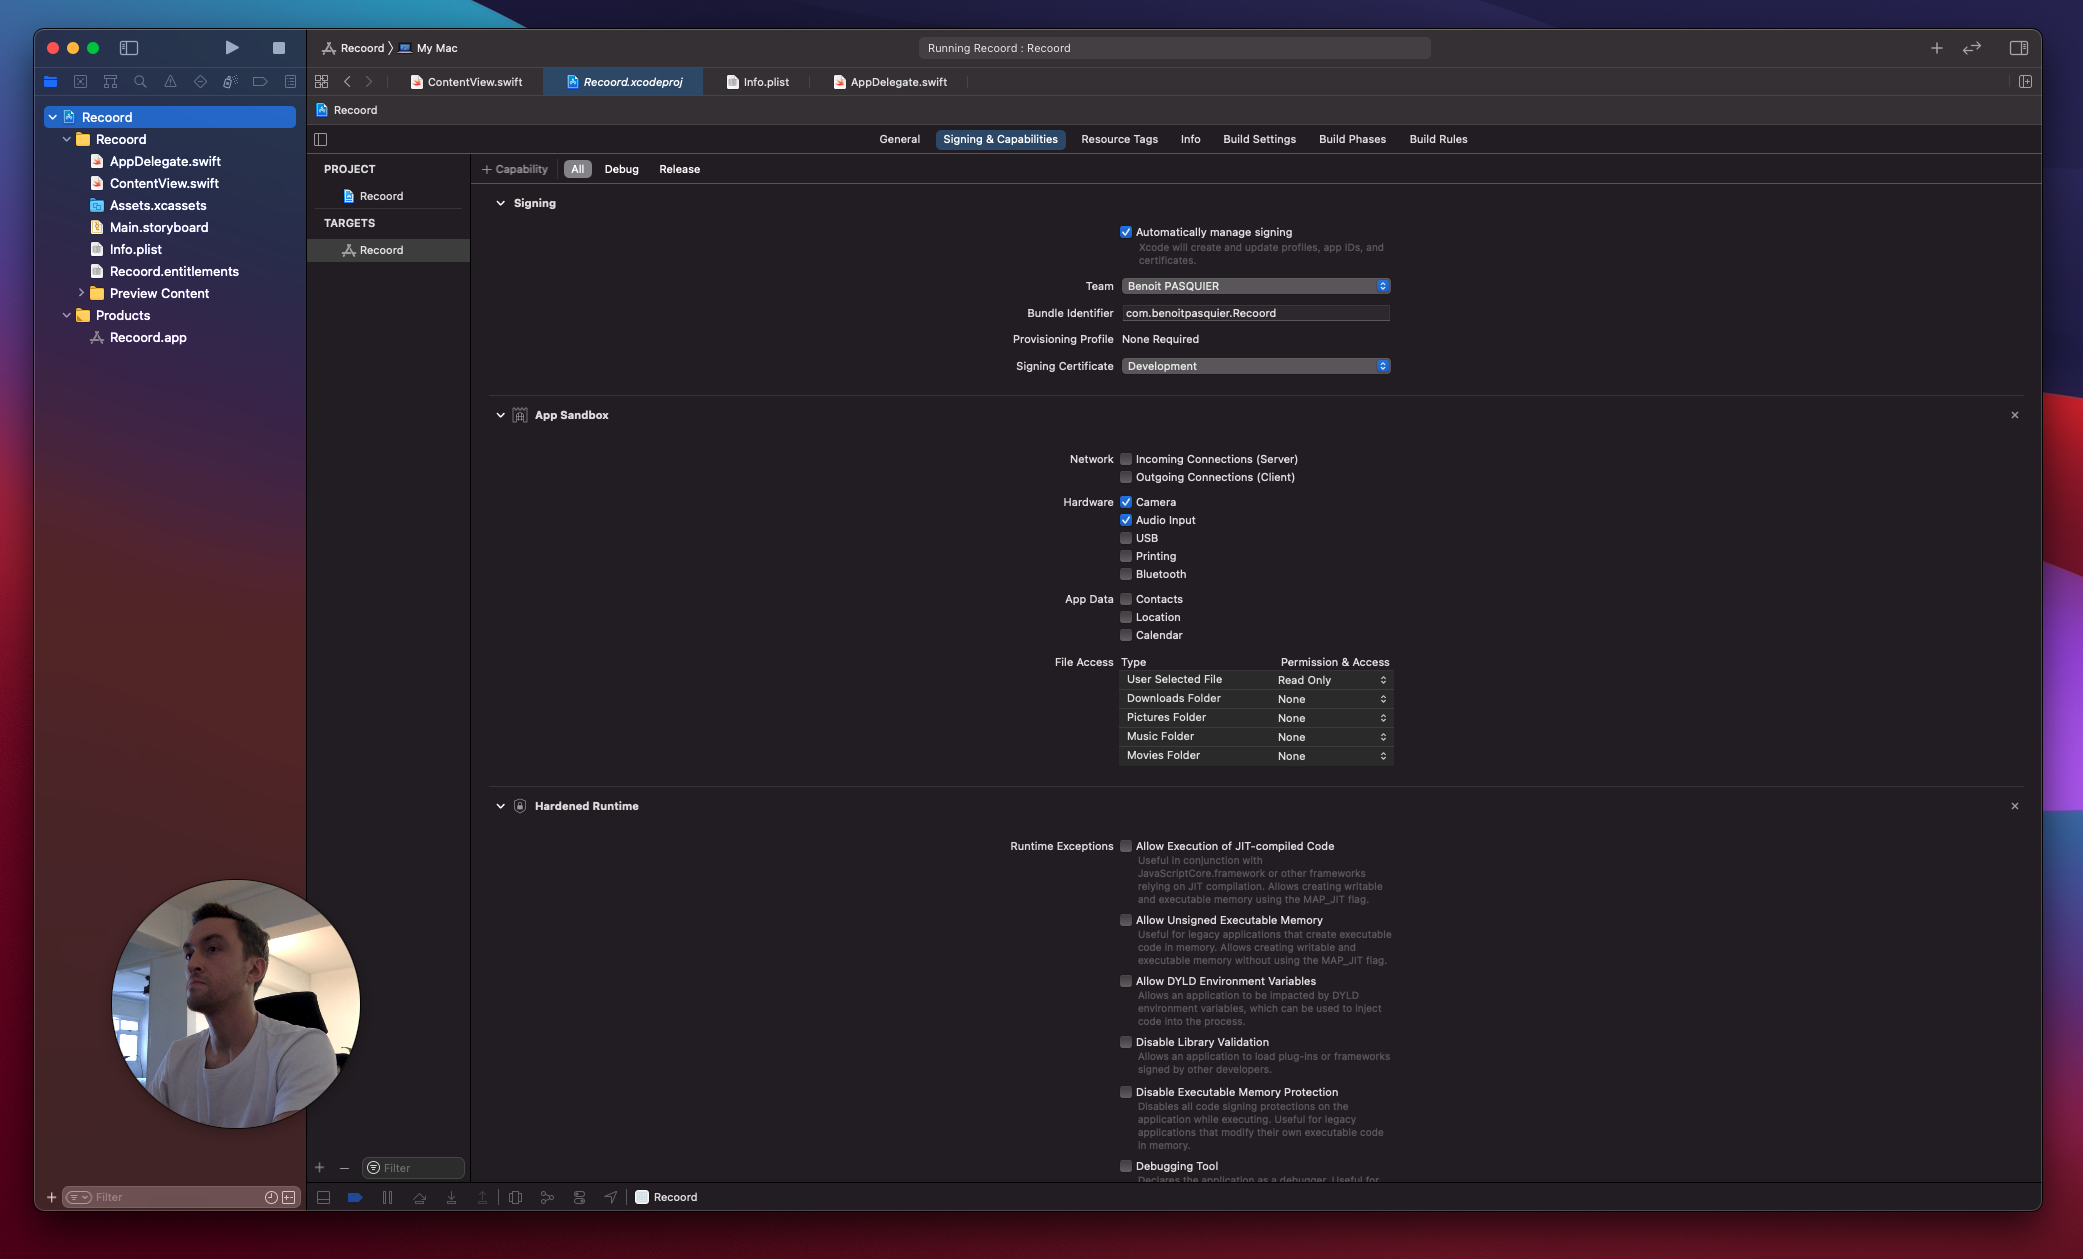
Like any macOS / iOS app, when we try to use the hardware, we need specific permissions. That’s a requirement as well for the camera on macOS.
So I’ll create a specific class to handle the camera detection and its permissions. Once granted, it will start rendering the webcam content.
class ContentViewModel: ObservableObject {

    @Published var isGranted: Bool = false
    var captureSession: AVCaptureSession!
    private var cancellables = Set<AnyCancellable>()

    init() {
        captureSession = AVCaptureSession()
        setupBindings()
    }

    func setupBindings() {
        $isGranted
            .sink { [weak self] isGranted in
                if isGranted {
                    self?.prepareCamera()
                } else {
                    self?.stopSession()
                }
            }
            .store(in: &cancellables)
    }

    func checkAuthorization() {
        switch AVCaptureDevice.authorizationStatus(for: .video) {
            case .authorized: // The user has previously granted access to the camera.
                self.isGranted = true

            case .notDetermined: // The user has not yet been asked for camera access.
                AVCaptureDevice.requestAccess(for: .video) { [weak self] granted in
                    if granted {
                        DispatchQueue.main.async {
                            self?.isGranted = granted
                        }
                    }
                }

            case .denied: // The user has previously denied access.
                self.isGranted = false
                return

            case .restricted: // The user can't grant access due to restrictions.
                self.isGranted = false
                return
        @unknown default:
            fatalError()
        }
    }

    func startSession() {
        guard !captureSession.isRunning else { return }
        captureSession.startRunning()
    }

    func stopSession() {
        guard captureSession.isRunning else { return }
        captureSession.stopRunning()
    }

    func prepareCamera() {
        captureSession.sessionPreset = .high

        if let device = AVCaptureDevice.default(for: .video) {
            startSessionForDevice(device)
        }
    }

    func startSessionForDevice(_ device: AVCaptureDevice) {
        do {
            let input = try AVCaptureDeviceInput(device: device)
            addInput(input)
            startSession()
        }
        catch {
            print("Something went wrong - ", error.localizedDescription)
        }
    }

    func addInput(_ input: AVCaptureInput) {
        guard captureSession.canAddInput(input) == true else {
            return
        }
        captureSession.addInput(input)
    }
}
Let’s go through those steps one by one:
- When initialized, it creates a new session and subscribe to the state by using
isGranted. - It includes a method to check the permissions that toggles
isGrantedbased on the user’s input. - Once
isGrantedis true, it prepares the camera (actually detecting the hardware available)and add its input to the video session. - Finally, it starts capturing the video feed.
In short, the camera feed would be directed to AVCaptureSession once the app permissions are granted. From there, the view will start rendering a layout.
Our model and player are ready, we only need to include the final View to glue them together.
struct ContentView: View {

    @ObservedObject var viewModel = ContentViewModel()
    init() {
        viewModel.checkAuthorization()
    }

    var body: some View {
        PlayerContainerView(captureSession: viewModel.captureSession)
           .clipShape(Circle())
    }
}
The view will observe the changes to the viewmodel to know when the permissions have changed and re-layout the player.
That’s it. Pretty cool huh?
What’s the point using SwiftUI here?
I came to this point.
Great part of SwiftUI is the conditional modifier we can brings to the UI. So let’s create a small menu to customize the shape of our video.
The first part is to tidy up the AppDelegate code to keep our utility window floating and remove any background. I’ll also add a menu to choose a shape.
func applicationDidFinishLaunching(_ aNotification: Notification) {
    // Create the SwiftUI view that provides the window contents.
    let contentView = ContentView()

    window = NSWindow(
        contentRect: NSRect(x: 0, y: 0, width: 480, height: 300),
        styleMask: [.closable, .resizable],
        backing: .buffered, defer: false)
    window.isReleasedWhenClosed = true
    window.center()
    window.setFrameAutosaveName("Main Window")
    window.contentView = NSHostingView(rootView: contentView)
    window.makeKeyAndOrderFront(nil)
    window.level = .floating
    window.backgroundColor = .clear
    window.isMovable = true
    window.isMovableByWindowBackground = true

    statusBarItem = NSStatusBar.system.statusItem(withLength: CGFloat(NSStatusItem.variableLength))
    statusBarItem.menu = makeMenu()

    if let button = self.statusBarItem.button {
        button.title = "Recoord"
    }
}
Much better
Since I’ve created a menu, I need to set different properties to observe so that our view can react to it.
In this case, I’ll only focus on the shape (circle or rectangular) and if we want to switch the mirroring of the camera feed.
class UserSettings: ObservableObject {
    @Published var shape = Shape.circle
    @Published var isMirroring = false

    enum Shape {
        case circle
        case rectangle
    }

}
I need to update the AppDelegate to reflect the changes from the menu selection to the user settings. I also need to pass those settings to the view as environment object, to let it observe the changes as well
@NSApplicationMain
class AppDelegate: NSObject, NSApplicationDelegate {

    let settings = UserSettings(userDefault: .standard)

    func applicationDidFinishLaunching(_ aNotification: Notification) {
        // Create the SwiftUI view that provides the window contents.
        let contentView = ContentView().environmentObject(settings)

        // ...
    }

    @objc func makeRectangleCamera() {
        settings.shape = .rectangle
    }

    @objc func makeCircleCamera() {
        settings.shape = .circle
    }

    @objc func mirrorCamera() {
        settings.isMirroring.toggle()
    }
}
Last part is to listen to those changes within my main view, here the ContentView.
struct ContentView: View {

    @ObservedObject var viewModel = ContentViewModel()
    @EnvironmentObject var settings: UserSettings

    init() {
        viewModel.checkAuthorization()
    }

    var body: some View {
        PlayerContainerView(captureSession: viewModel.captureSession, settings: settings)
                .clipShape(shape)
    }

    var shape: some Shape {
        switch settings.shape {
        case .circle:
            return AnyShape(Circle())
        case .rectangle:
            return AnyShape(RoundedRectangle(cornerRadius: 25.0))
        }
    }
}

struct AnyShape: Shape {
    init<S: Shape>(_ wrapped: S) {
        _path = { rect in
            let path = wrapped.path(in: rect)
            return path
        }
    }

    func path(in rect: CGRect) -> Path {
        return _path(rect)
    }

    private let _path: (CGRect) -> Path
}
Here, I’ve a computed property for my shape to apply based on the user setting changes. I’m using AnyShape as a wrapper around Shape because having a condition in a computed property create an opaque implementation that the compiler struggle can’t get resolved.
Without it, I would get an error like following:
Function declares an opaque return type, but the return statements in its body do not have matching underlying types.
So our view is ready, but the mirroring need to be applied deep down to the CALayer. I’ll have to pass the properties deep down.
Last effort, I promise.
final class PlayerContainerView: NSViewRepresentable {
    typealias NSViewType = PlayerView

    let settings: UserSettings
    let captureSession: AVCaptureSession

    init(captureSession: AVCaptureSession, settings: UserSettings) {
        self.captureSession = captureSession
        self.settings = settings
    }

    func makeNSView(context: Context) -> PlayerView {
        return PlayerView(captureSession: captureSession, settings: settings)
    }

    func updateNSView(_ nsView: PlayerView, context: Context) { }
}

class PlayerView: NSView {

    private weak var settings: UserSettings?
    private var previewLayer: AVCaptureVideoPreviewLayer?
    private lazy var cancellables = Set<AnyCancellable>()

    init(captureSession: AVCaptureSession, settings: UserSettings? = nil) {
        self.settings = settings
        previewLayer = AVCaptureVideoPreviewLayer(session: captureSession)
        super.init(frame: .zero)

        setupLayer()
    }

    func setupLayer() {

        previewLayer?.frame = self.frame
        previewLayer?.contentsGravity = .resizeAspectFill
        previewLayer?.videoGravity = .resizeAspectFill
        previewLayer?.connection?.automaticallyAdjustsVideoMirroring = false

        layer = previewLayer

        settings?.$isMirroring
            .subscribe(on: RunLoop.main)
            .sink { [weak self] isMirroring in
                self?.previewLayer?.connection?.isVideoMirrored = isMirroring
            }
            .store(in: &cancellables)
    }

    required init?(coder: NSCoder) {
        fatalError("init(coder:) has not been implemented")
    }
}
To react to the latest changes, I’m using Combine framework so that the layer can reflect the settings accordingly.
Note it’s important to subscribe on the main thread to make sure this code isn’t run on any other thread.
Alright, time to test it.
Yay! It works!
The great part about this utility app, I can resize for a portrait, square or landscape dimension at any time. The only downside so far, it get tricky to resize the circle by its corner.
So we’ve seen how to create a small webcam utility app, using some AppKit and SwiftUI basic components and exposing one to another to be able to reshape our webcam content based on the user settings.
I really enjoyed using SwiftUI for a macOS app, especially the ability to customize app shape based on specific conditions, I don’t think it’s something we often get from macOS apps.
What about you? Did you try SwiftUI for macOS apps? What challenges did you face?