Introduction to sleep analysis with HealthKit with Swift
HealthKit is a powerful tool if you want to create an iOS mobile app based on health data. However, it’s not only for body measurements, fitness or nutrition; it’s also sleep analysis. In this HealthKit tutorial, I will show you how to read and write some sleep data and save them in Health app.
UPDATE - April 2020: Originally written for Swift 1.0, then 2.0, I’ve updated this post for latest Swift 5.1 version and Xcode 11.3.
Where to start
If you don’t know HealthKit framework, the better way to start is on HealthKit Reference - Apple Developer. If you don’t have time to read all this stuff, here is a small resume.
HealthKit provides a central repository for health and fitness data on iPhone and Apple Watch. With the user’s permission, apps communicate with the HealthKit store to access and share this data.
HealthKit is also designed to manage and merge data from multiple sources.
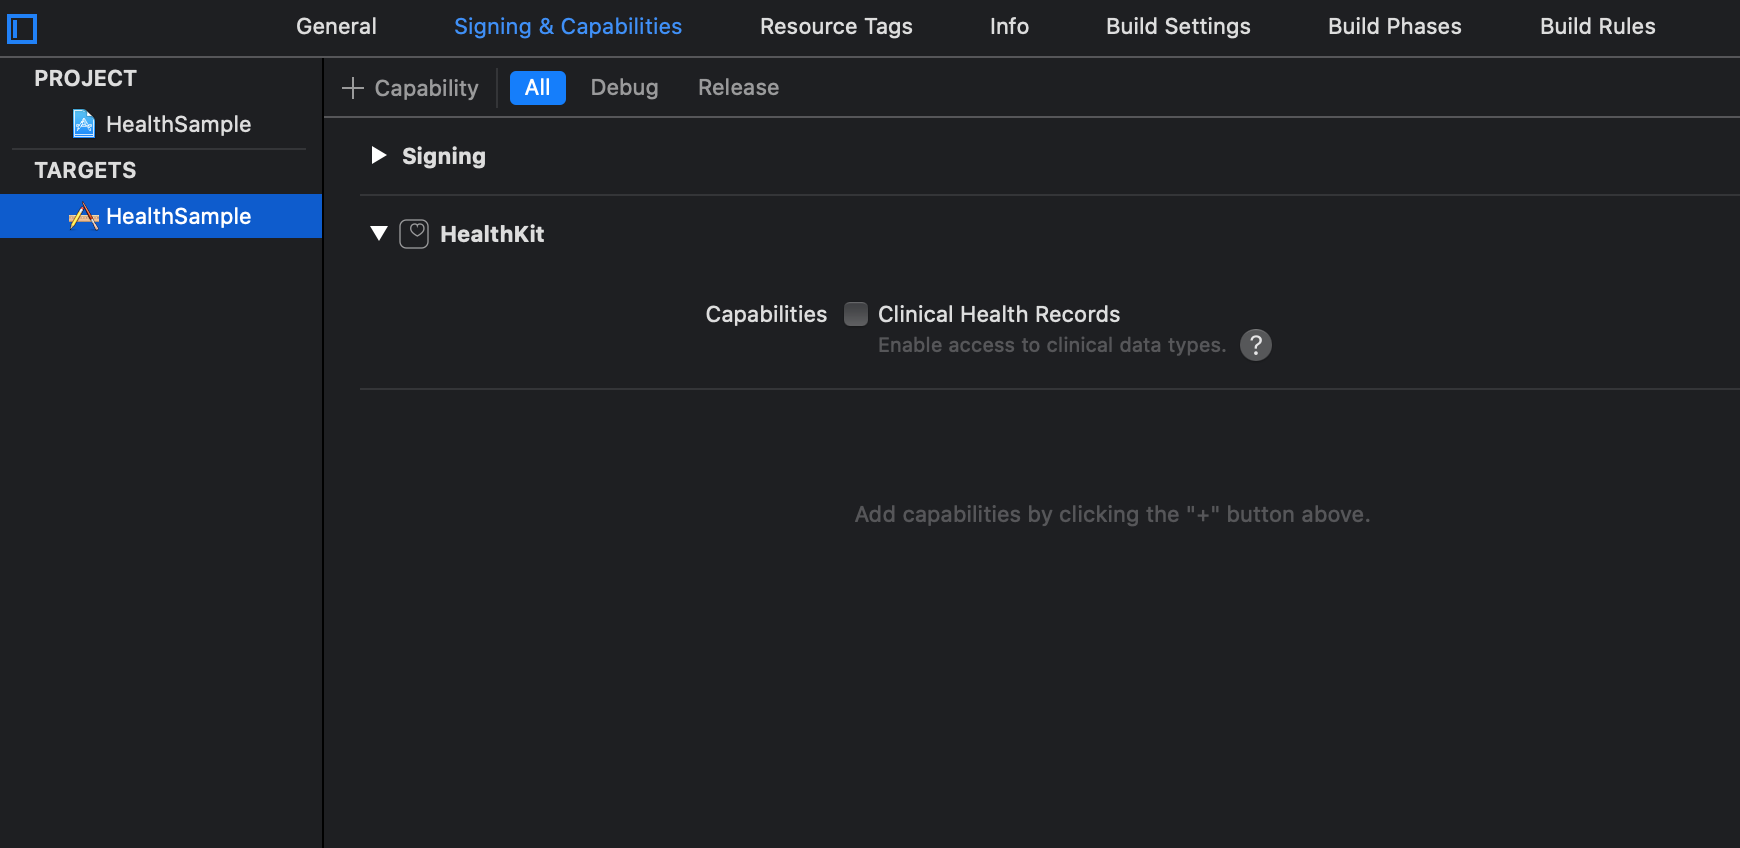
You should allow your app to get access to HealthKit. In your app project, go to your current target, under Signing & Capabilities and switch on the HealthKit button. It will add HealthKit framework automatically to your project.
You’ll also need to add the description in your info.plist explaining why you need access to those data. Without it, the app will crash.
<dict>
    ...
	<key>NSHealthUpdateUsageDescription</key>
	<string>Sample app sleep</string>
	<key>NSHealthShareUsageDescription</key>
	<string>Sample app sleep</string>
	<key>CFBundleDevelopmentRegion</key>
</dict>
We are now ready to code.
HealthKit framework
At the beginning, there was HKHealthStore. You will use it to get access to the user’s health data. With this tool, we can share data in Health app or import them. Theses both features are based on an authorization request. That’s how it’s work in Swift :
import HealthKit

func requestSleepAuthorization() {
    let healthStore = HKHealthStore()

    if let sleepType = HKObjectType.categoryType(forIdentifier: .sleepAnalysis) {
        let setType = Set<HKSampleType>(arrayLiteral: sleepType)
        healthStore.requestAuthorization(toShare: setType, read: setType) { (success, error) in

            if !success || error != nil {
                // handle error
                return
            }

            // handle success
        }
    }
}
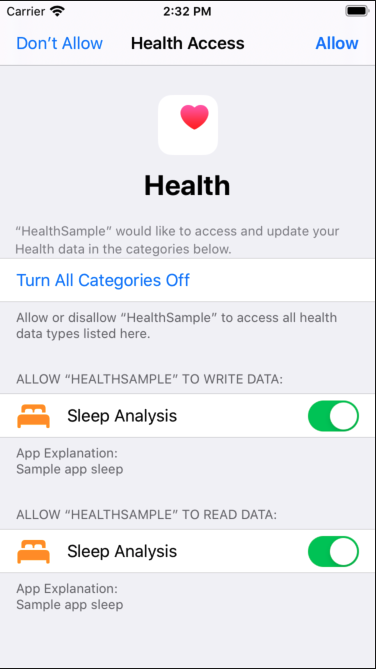
This code will prompt a Health window to ask permission to the current user. With the completion block, you can handle success or error and get the final result.
Be considerate with people privacy. No need to add all params if you only need “share authorization” or “read authorization”. It’s really important to request only what you need because Apple can reject your app if they don’t understand your goal with these data. Choose wisely.
Now we have permission to make some request. Let’s get some sleep data!
Read data in Health
To read some data, we need to prepare our query. My point of view is that’s very similar with CoreData framework: we define object and we can use predicates, sort descriptors or limits. Here is my code to get sleep data between two dates.
import HealthKit

func readSleep(from startDate: Date?, to endDate: Date?) {

    let healthStore = HKHealthStore()

    // first, we define the object type we want
    guard let sleepType = HKObjectType.categoryType(forIdentifier: .sleepAnalysis) else {
        return
    }

    // we create a predicate to filter our data
    let predicate = HKQuery.predicateForSamples(withStart: startDate, end: endDate, options: .strictStartDate)

    // I had a sortDescriptor to get the recent data first
    let sortDescriptor = NSSortDescriptor(key: HKSampleSortIdentifierEndDate, ascending: false)

    // we create our query with a block completion to execute
    let query = HKSampleQuery(sampleType: sleepType, predicate: predicate, limit: 30, sortDescriptors: [sortDescriptor]) { (query, result, error) in
        if error != nil {
            // handle error
            return
        }

        if let result = result {

            // do something with those data
            result
                .compactMap({ $0 as? HKCategorySample })
                .forEach({ sample in
                    guard let sleepValue = HKCategoryValueSleepAnalysis(rawValue: sample.value) else {
                        return
                    }

                    let isAsleep = sleepValue == .asleep

                    print("HealthKit sleep \(sample.startDate) \(sample.endDate) - source \(sample.sourceRevision.source.name) - isAsleep \(isAsleep)")
                })
        }
    }

    // finally, we execute our query
    healthStore.execute(query)
}
At the end, we are able to read some sleep data from Health app. We know if it was a sleep time, or a bed time, and which app pushed it. It’s a really good thing to know because some apps are not accurate, we can filter them to ignore their data. For me, I import only connected app data from Jawbone, Withings, Fitbit or Beddit and the manual data added by the user.
Write data in Health
func writeSleep(_ sleepAnalysis: HKCategoryValueSleepAnalysis, startDate: Date, endDate: Date) {

    let healthStore = HKHealthStore()

    // again, we define the object type we want
    guard let sleepType = HKObjectType.categoryType(forIdentifier: .sleepAnalysis) else {
        return
    }

    // we create our new object we want to push in Health app
    let sample = HKCategorySample(type: sleepType, value: sleepAnalysis.rawValue, start: startDate, end: endDate)

    // at the end, we save it
    healthStore.save(sample) { (success, error) in
        guard success && error == nil else {
            // handle error
            return
        }

        // success!
    }
}
Finally, we added a new bed time in Health app. It’s really easy to read and to write some data. We just need to create a new sample object which can be saved with HealthKit.
Careful with what you read
HealthKit is an easy tool to get access to a lot of personal data. But careful with what you read: if an other app saved inaccurate data in Health app, you can compromise your own when you read them.
You also must care about how you read and write: HealthKit doesn’t handle duplicated data, we can have multiple sleep data at the same time with the same start date or end date, from multiple sources.
Hope this HealthKit tutorial will help you, comment it if you have any questions.
Update – June 2016
Since I published this post last year, I received more and more emails asking about details on the implementation. I’m happy to let you know that I’ve published a demo app on Github