How to use Vapor Server to write stronger UI tests in Swift
Even if I usually stay focus on the customer facing side of mobile development, I like the idea of writing backend api with all the security that Swift includes. Starting small, why not using Swift Server for our UI Tests to mock content and be at the closest of the real app.
When it comes to testing in Swift, we often need to mock data to test our code and make sure it behave as expected. If it’s straight forward for unit tests, this can be harder when it comes to UI tests.
One way I learn is to inject environment variables, but I can’t imagine having more than 10 variables in it. At the same time, it would be more or more code on the client side to get the right content. The bigger the project becomes, the harder it will be to handle it.
So why not having a local server for our UI tests to keep all the data mocked at one place and align it with those expected behavior? That’s what I’m going to do today.
This post is based on a currency app I’ve used in the past to introduce MVVM pattern. I’ll use the same one to include a local server and use it for ui testing.
Swift Server Side
For this example, I’m going to use Vapor framework. There are many others frameworks, I’m sure you can adapt the coming logic if you use another one.
First, I create a Vapor project within the same area of my iOS project. It comes with default template, but I’ll stay focus on what concerns us.
$ vapor new TemplateProjectServer # create folder and project
$ cd TemplateProjectServer        # go into the folder
$ vapor xcode                     # generate xcode project
To keep it a clear visibility the whole project, I also created a workspace including the iOS app as well as the server one. I also clean the available target to keep only what interest me.
Then, I created the currency model I’m going to return. The model is slightly different from the iOS app because I’m mocking only specific currencies, so I hardcoded the currency code. If your fields aren’t dynamic, you could keep the same one
import Vapor

struct CurrencyRate: Content {
    let eur: Double
    let usd: Double
    let gbp: Double
    let sgd: Double

    private enum CodingKeys: String, CodingKey {
        case eur = "EUR"
        case usd = "USD"
        case gbp = "GBP"
        case sgd = "SGD"
    }
}

struct Converter: Content {
    let base : String
    let date : String
    let rates : CurrencyRate
}
Here I’m using Content protocol from Vapor framework so that Vapor can automatically return JSON format. Content extends Swift Codable so I can also rewrite CodingKeys.
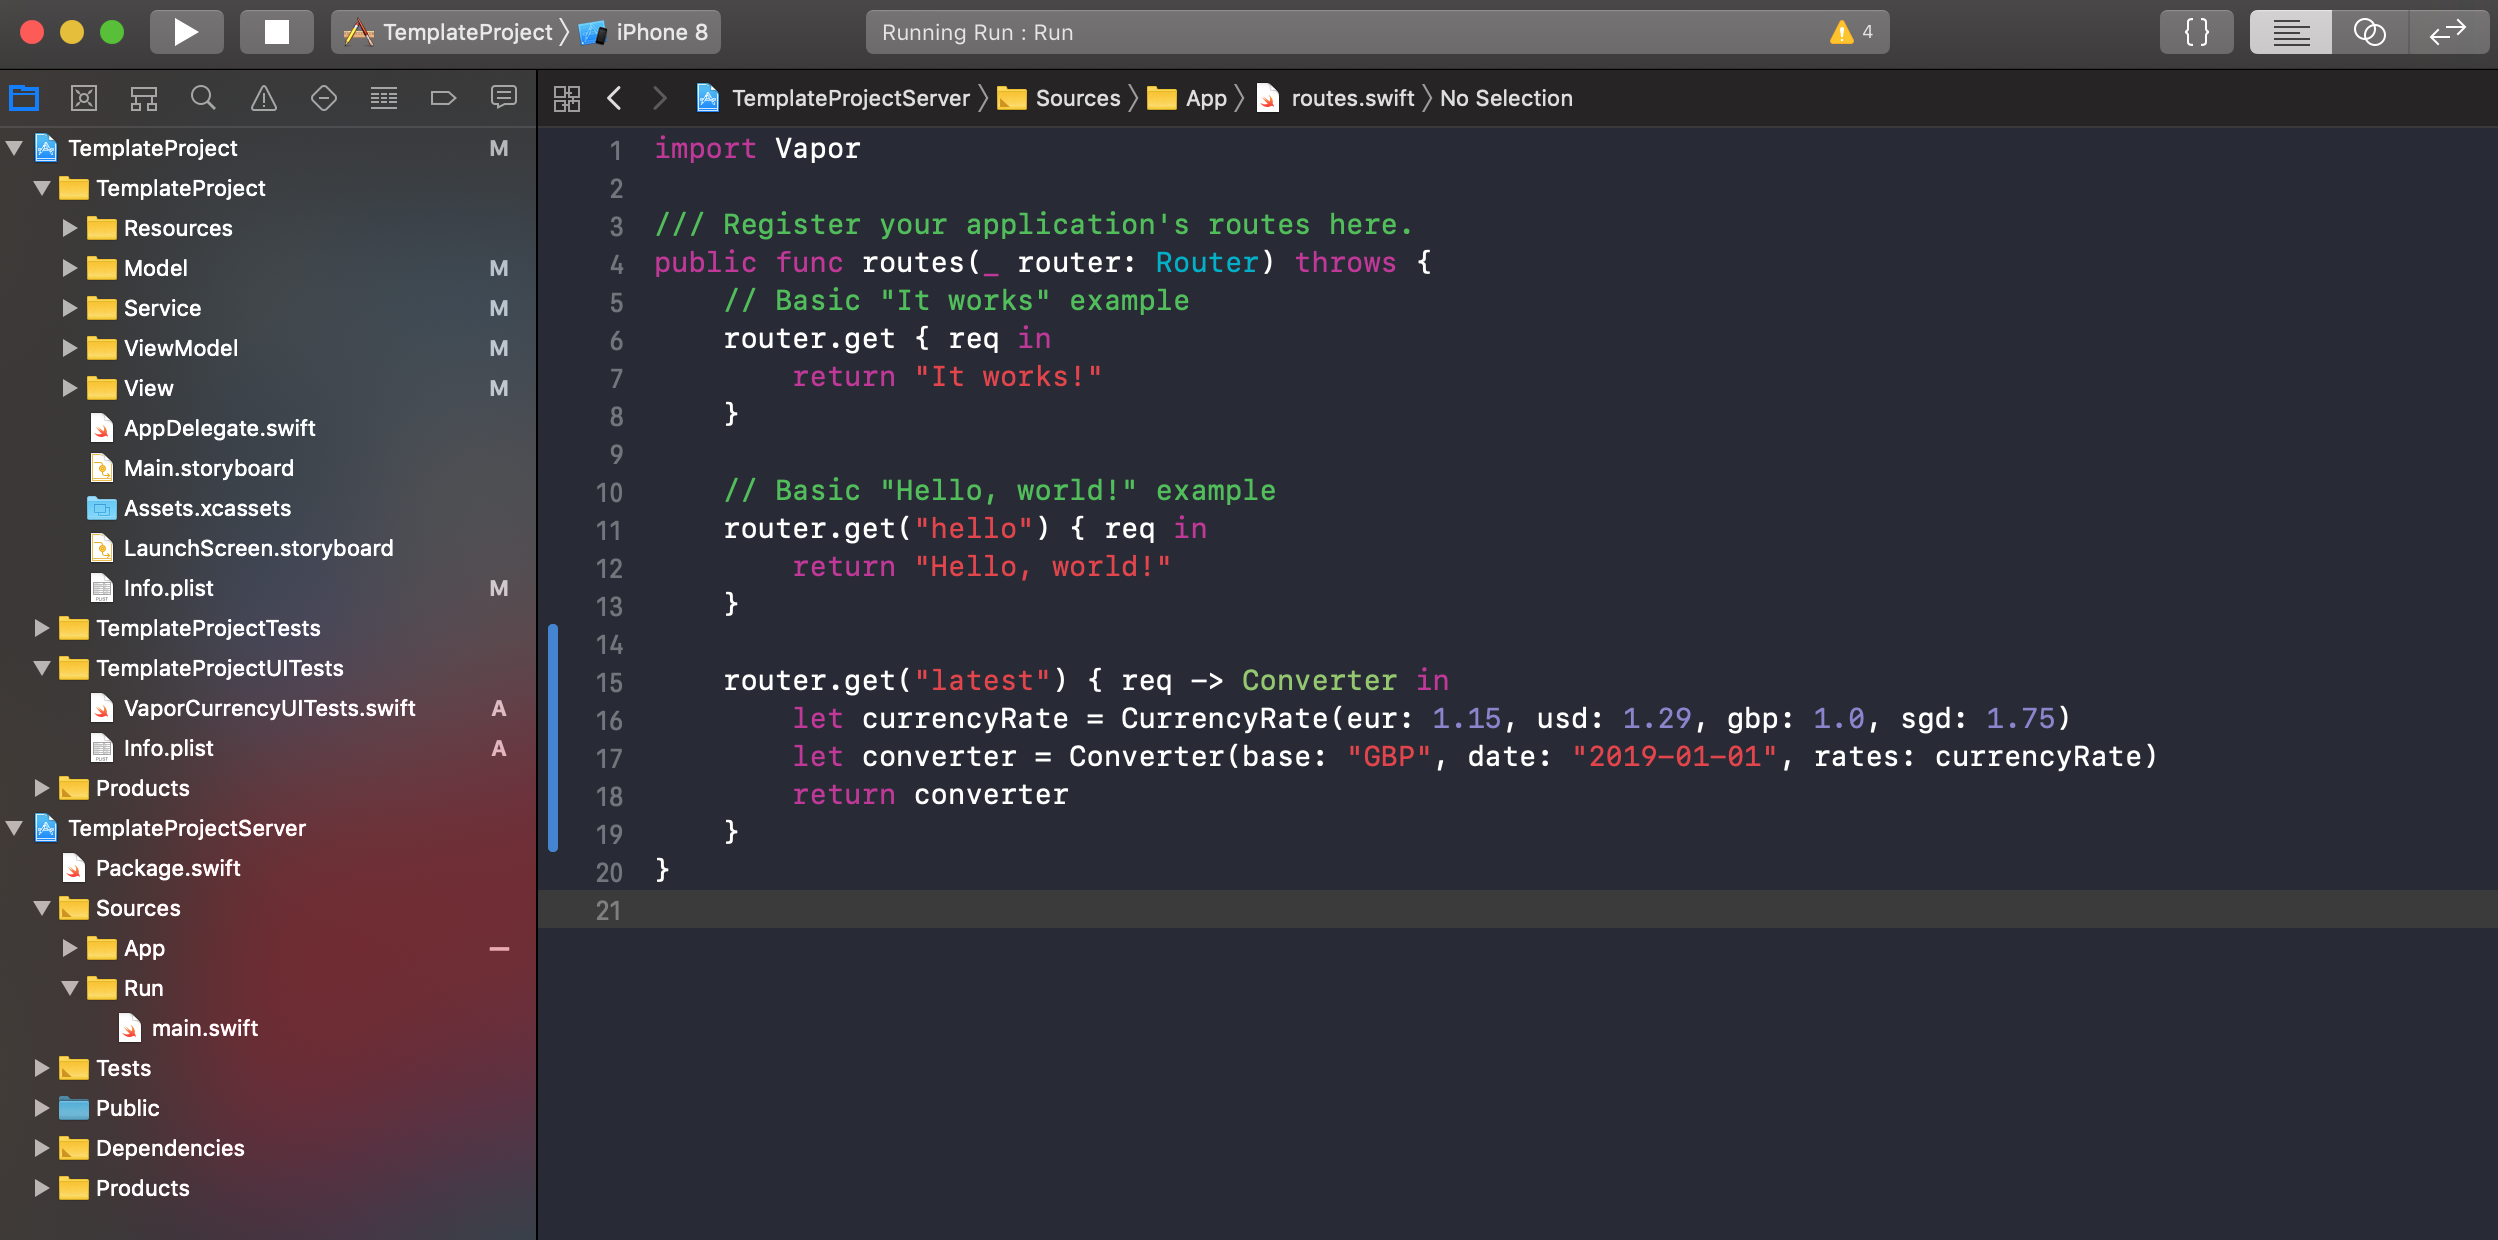
Now we only need a route to return our new object.
/// Register your application's routes here.
public func routes(_ router: Router) throws {
    // Basic "It works" example
    router.get { req in
        return "It works!"
    }

    router.get("latest") { req -> Converter in
        let currencyRate = CurrencyRate(eur: 1.15, usd: 1.29, gbp: 1.0, sgd: 1.75)
        let converter = Converter(base: "GBP", date: "2019-01-01", rates: currencyRate)
        return converter
    }
}
Here I create a route to be able to get currency rates. Although I didn’t implement any other logic (filter per currency, etc) but remember that it’s not our goal here. We only want to get some data from api to test the UI display without relying on the production server.
After building and launching our server, I can see my new rates under http://localhost:8080/latest. Our server is ready, only need to add our UI Tests.
UI Tests
Before diving into the test itself, we need to add couple things to our project. First, we need to support HTTP request coming from our localhost. By default, Apple doesn’t allow non HTTPS request, so we need to update our permissions.
<key>NSAppTransportSecurity</key>
    <dict>
        <key>NSAllowsArbitraryLoads</key>
        <false/>
        <key>NSExceptionDomains</key>
        <dict>
            <key>localhost</key>
            <dict>
                <key>NSIncludesSubdomains</key>
                <true/>
                <key>NSExceptionAllowsInsecureHTTPLoads</key>
                <true/>
                <key>NSExceptionRequiresForwardSecrecy</key>
                <true/>
            </dict>
            <!-- add more domain here -->
        </dict>
    </dict>
The second one is to be able to catch the environment variable for our tests. It allows to swap the url from production to our localhost when testing. I still keep a default value just in case.
final class CurrencyService : RequestHandler, CurrencyServiceProtocol {

    var baseUrl: String {
        return ProcessInfo.processInfo.environment["BASEURL"] ?? "https://api.exchangeratesapi.io"
    }

    var endpoint: String {
        return baseUrl + "/latest?base=GBP"
    }
Finally we can create our test and use our new testing environment
import XCTest

class VaporCurrencyUITests: XCTestCase {

    // ...

    func testExample() {
        let app = XCUIApplication()
        app.launchEnvironment = ["BASEURL" : "http://localhost:8080"]
        app.launch()
		  let tablesQuery = app.tables
        let count = tablesQuery.cells.count
        XCTAssert(count == 4)
    }
}
This test is quite simple, I make sure that with a valid request I have the same amount or data displayed. Make sure you run first the Vapor project before launching the UITests, otherwise it will fail.
Regarding our settings, we could go further and customize our url to expect specific amount of result and test multiple times, or test when the api (expectedly) failing. It gives us many many ways to improve our UI tests.
Continuous deployment
Our project is nicely setup but we still need to build and run different targets to launch server and tests. I haven’t find the right balance yet but I’m sure we could go further and automatically launch our server as soon as we launch our UI tests.
First I tried to use shell script, but as vapor keeps running, the tests were never launched. There might be another way to do that but in case you are curious to look into it.
if which vapor >/dev/null; then
    cd ./TemplateProjectServer
    vapor run
else
    echo "warning: Vapor is not installed, download Vapor first"
fi
Another way to handle this is to use external dependencies to execute shell script from within Swift code. I’m thinking about swift-sh or ShellOut but they might be others.
If you don’t run your UI tests locally but from a CI job, you might not have this issue and just run it from your CI script, fastlane or any other configuration. It probably makes on CI actually.
This whole project is available on Github under vapor branch.
In conclusion, we’ve seen how to integrate a Swift Server project into our iOS project to build stronger and more reliable UI tests. It’s also a small introduction for me to Swift Server with Vapor but I like the idea of Swift developers doing the extra mile on backend side to get better testability of the iOS app.
What do you guys think? Have you already tried Swift Server for testing purpose? What makes it great?
Happy coding