Using Charles as SSL Proxy on iOS
Most of apps use HTTPS request to access data, and because of SSL encryption, it can be tough to debug it from iOS apps that are already on the App Store. Charles is the perfect tool to help you inspect your HTTPS requests.
Charles Proxy is a software designed to debug web application via proxy. It includes a 30 days trial version.
As iOS mobile developer, you can use it as HTTP Proxy with your iOS device in a man in the middle approach to inspect what requests are made from your phone. Here are the steps to enable that on your phone.
Enable SSL proxy on iOS
Before anything, be sure that your device and computer are on the same network. Then you need to install Charles Root Certificate on your device. To do so, follow Help > SSL Proxying > Install Charles Root Certificate on a Mobile Device or Device. It will give you your IP address and port to use.
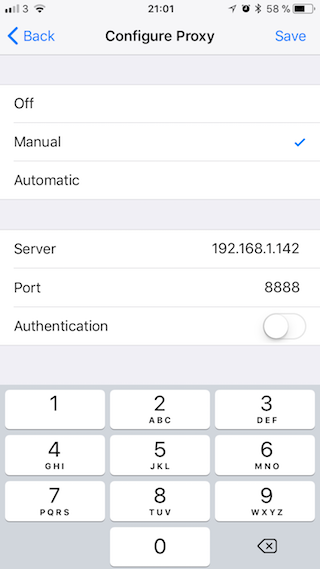
On your iPhone, under your Wifi Settings, you need to enable HTTP Proxy with your computer IP address given by Charles.
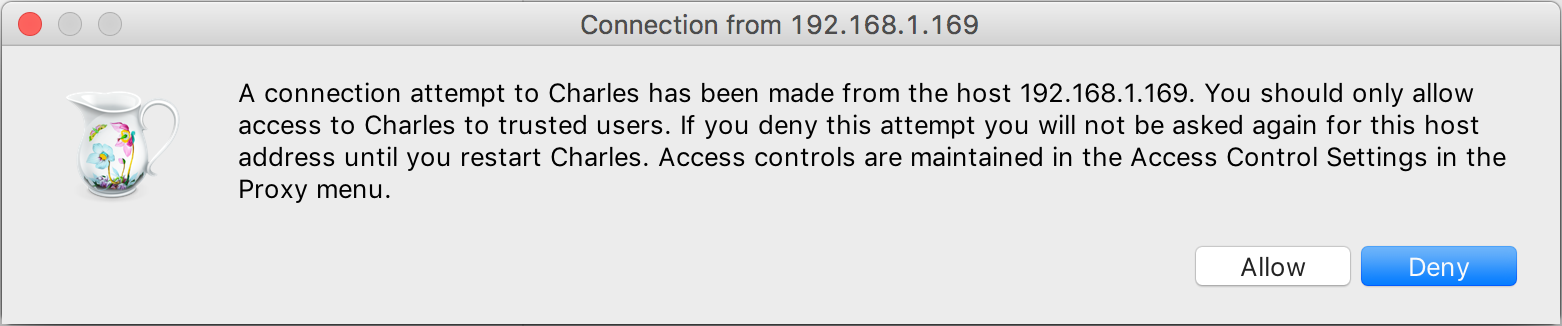
Once saved, a dialog should prompt on your laptop to ask for permission to allow this new access. Your device connection is now going throw Charles.
You can see HTTP request straight away. However, to inspect HTTPS requests, there is couple more steps to go throw to enable SSL Proxy.
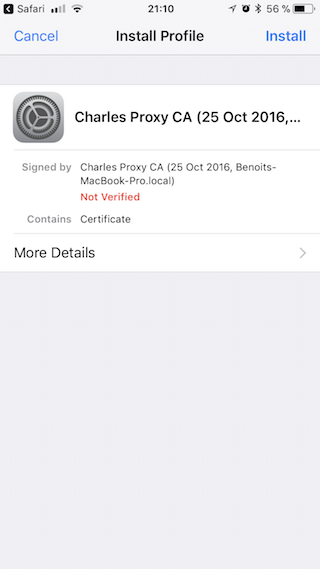
Using Safari, you have to navigate to chls.pro/ssl to install Charles certificate on your mobile and verify it. You can still find it later under Settings > General > Profiles.
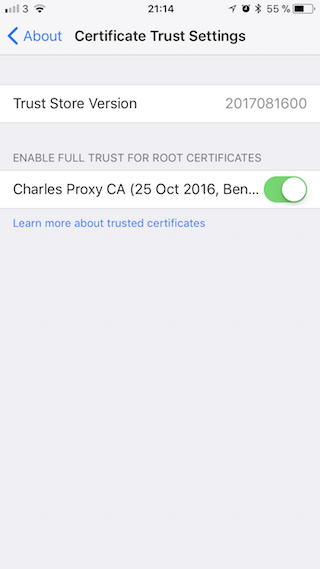
Once the certificate installed on your phone, we need to be sure, it’s enabled. To do so, follow Settings > General > About > Certificates and enable the one you just download.
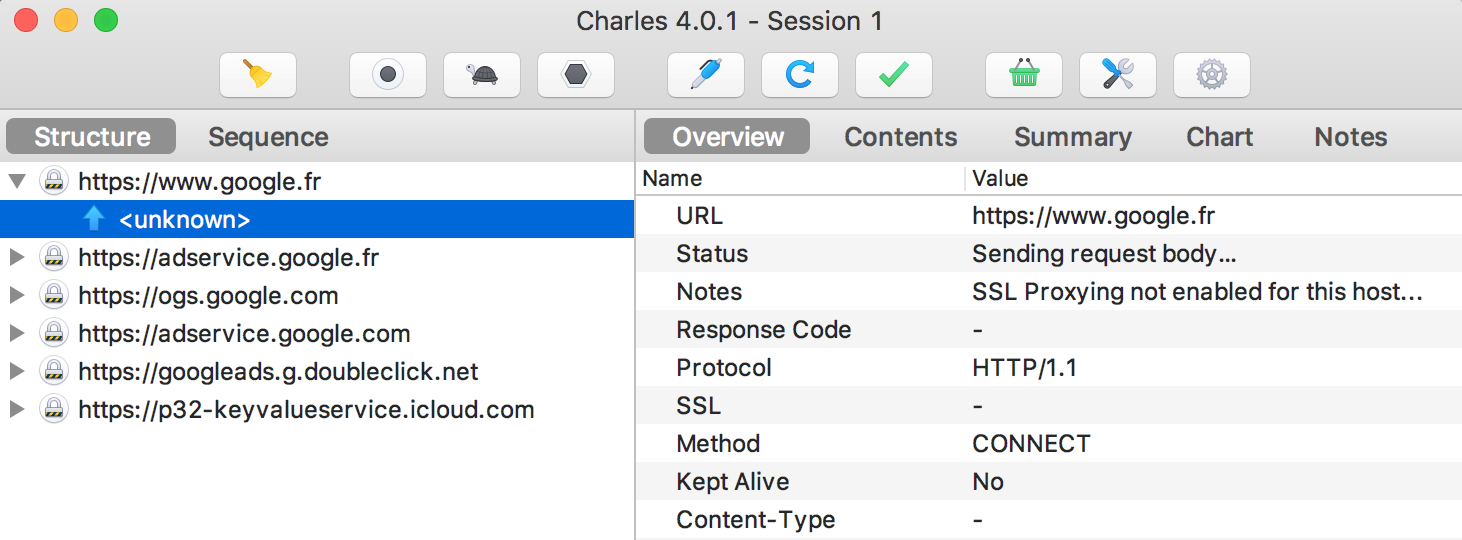
Testing on Google website, I still can’t see the content sent. I also can see SSL Proxy not enabled for this host. We need to finish enable SSL Proxy on Charles side.
Enable SSL proxy on Charles
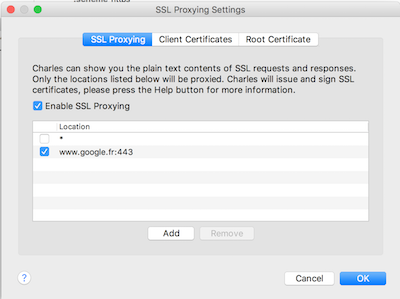
Back to your laptop, under Proxy > SSL Proxy Settings, we’ll add a line to cover Google domain. I also specified HTTPS port 443 to be keep it clean. You can add a * for a wildcard usage.
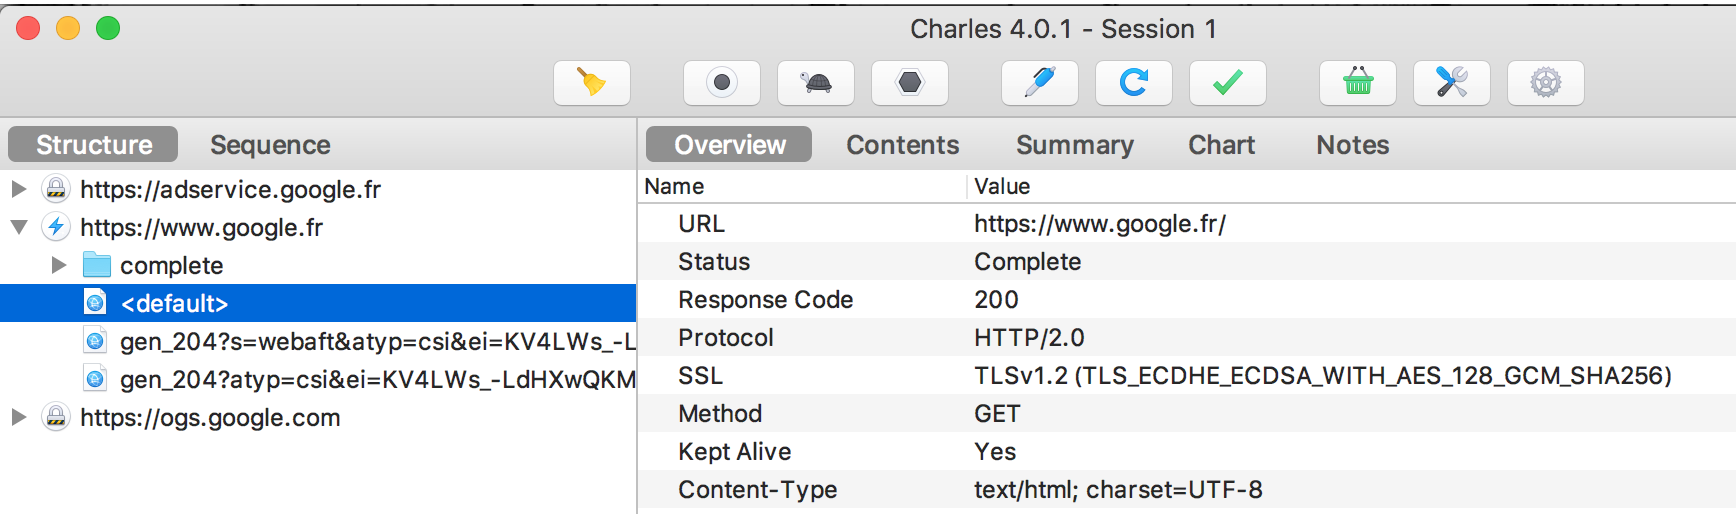
Finally all the content from my request is now clear.
What’s happening in the background, the request from your laptop to Google is still under HTTPS. However, while using your local trusted certificate from your laptop to your phone enable a clear access to those data sent, before the request is actually made. Nobody else on your local network could access to those unencrypted data.
This example covers debugging request from web content like Safari. However, if you want to use it to debug a specific mobile app, you might need to add a security flag to your plist file to enable that feature.
<key>NSAppTransportSecurity</key>
<dict>
  <key>NSAllowsArbitraryLoads</key>
  <true/>
</dict>
In conclusion, Charles Proxy is pretty intuitive to use but can be tricky to set up, I hope this tutorial would make it easier for others too.
If you have any questions or suggestions about that article, I’ll be happy to help in the comment section.