Build your Android app with Bitbucket Pipeline and HockeyApp
Configuring a continuous integration can be tricky for mobile apps. Let’s see how quick it is to build an Android app with Bitbucket Pipeline and deliver it with App Center app (ex HockeyApp).
If you missed it, Bitbucket Pipeline is a continuous integration service that Atlassian integrated in their git solution Bitbucket last year. It’s based on Docker container technology and require only a YAML file to start using it.
Note: HockeyApp now integrated into AppCenter, hence this post might not be relevant anymore.
Bitbucket Pipeline
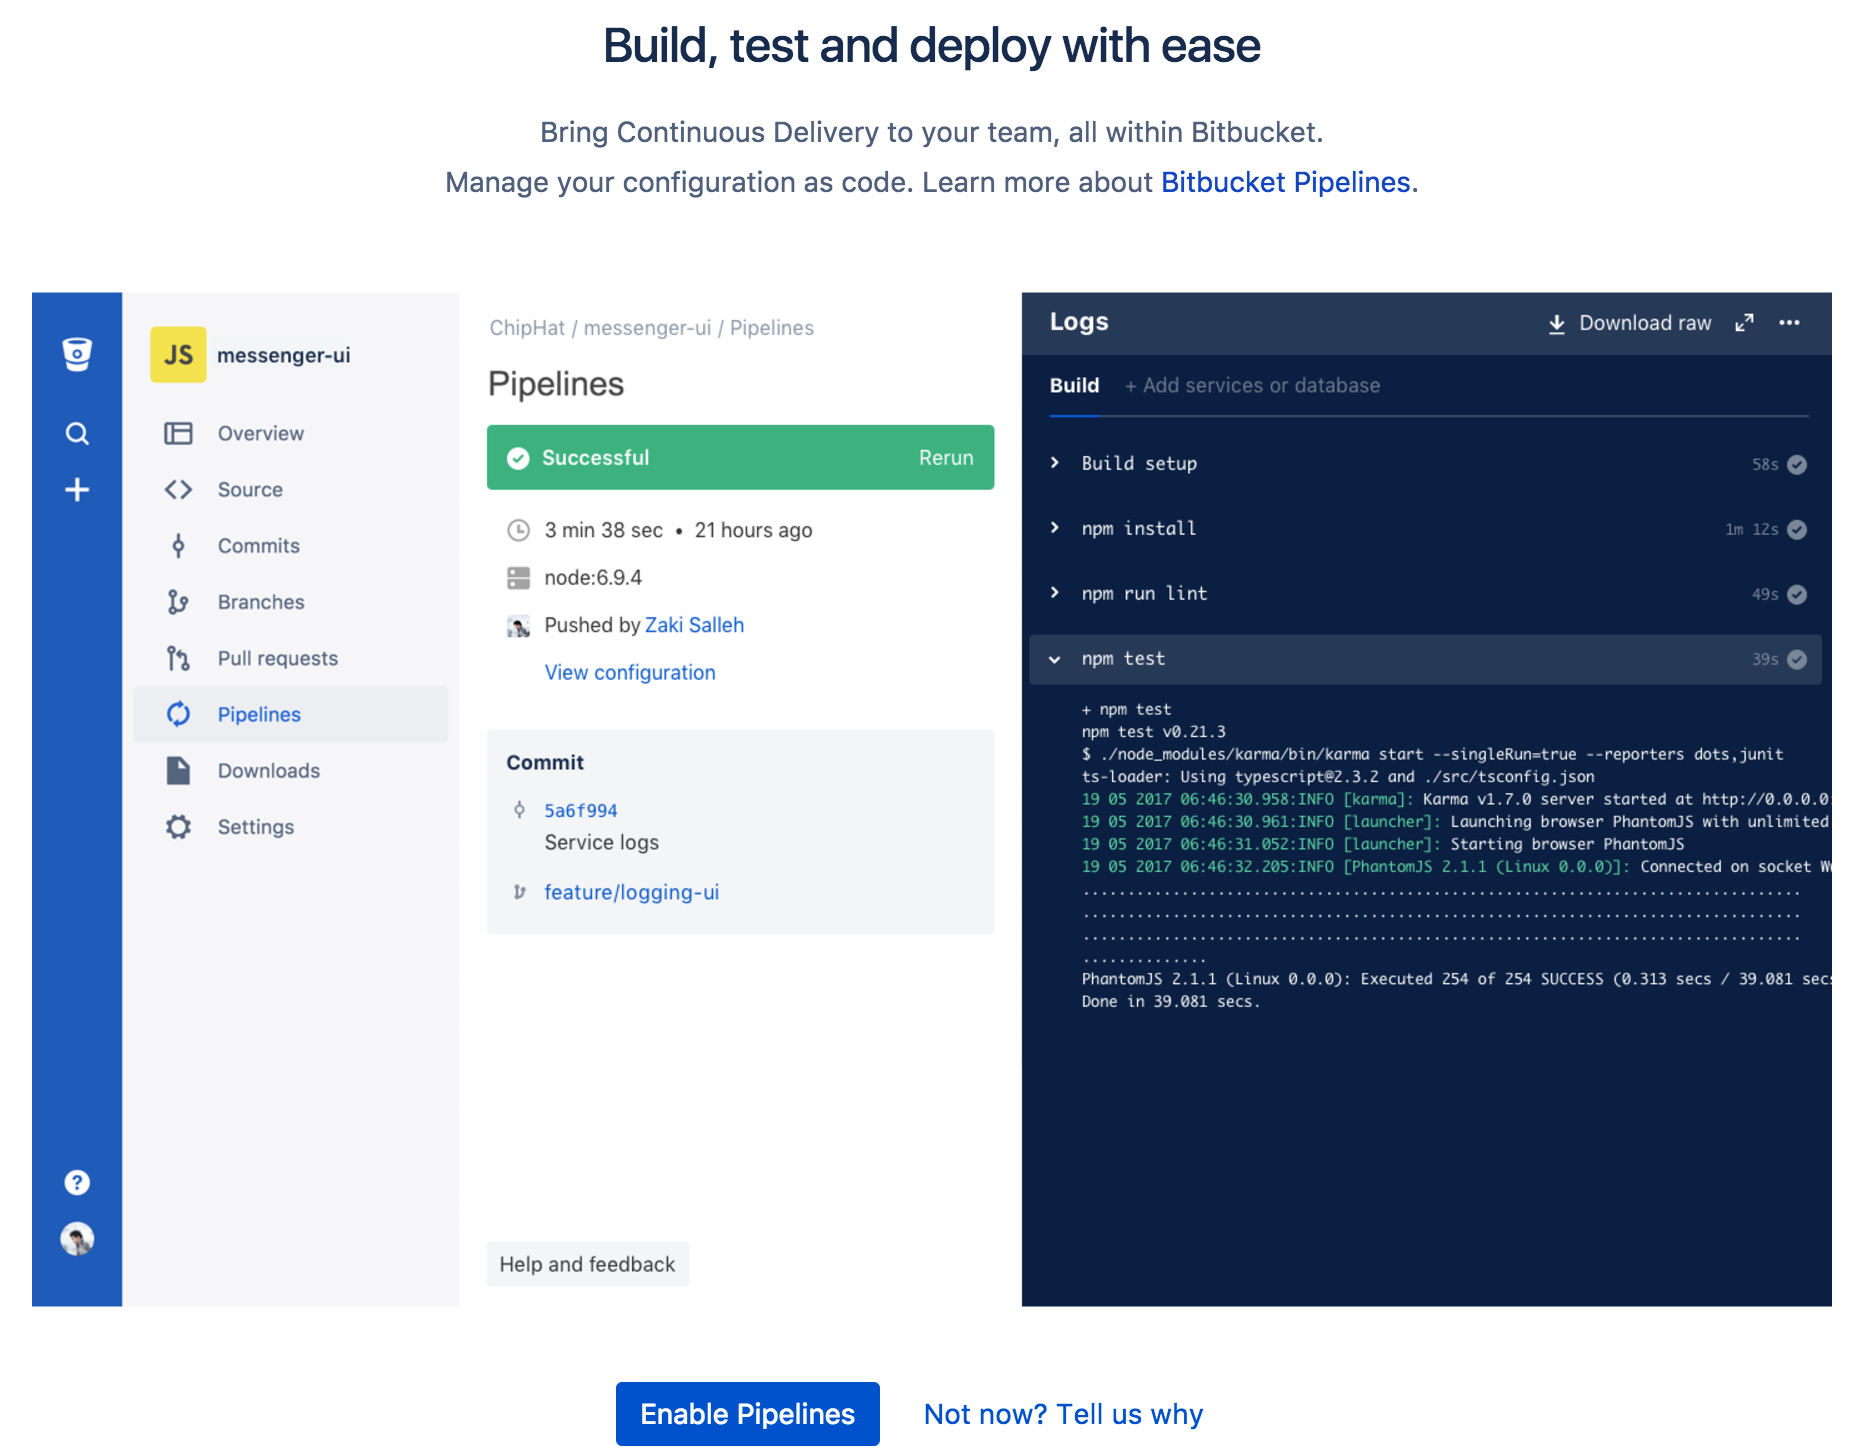
To start using Bitbucket Pipeline, you simply need to go to your repository, and under the Pipeline menu enable it. It will automatically create a YAML file to start with under your master branch.
You’ll also need a Docker image to use to build your app. It should include your Android build environment to be able to compile it (Gradle, …). To simplify it, Uber dev team created one for this purpose that you can use here. If you are familiar with Docker, I would recommend to create you own image instead, you might not need everything that Uber included in their image. It would create a lighter image to use and improve how hast your pipeline takes time.
Next step will be to set up your YAML file. Here is an example.
# -----
# You can specify a custom docker image from Docker Hub as your build environment.
image: uber/android-build-environment:latest

pipelines:
  default:
    - step:
        script: # Modify the commands below to build your repository.
          - echo "Start default step"
          - ./gradlew assembleDebug
First, I specify the image that is going to be used to build the app. Then by default, for any branches, it will execute commands. Here I build a debug APK using Gradle wrapper. Our continuous integration is ready!
What if I want to do specific steps for a branch?
Good question. Bitbucket Pipeline documentation includes many commands to customize your build, including one to specify branches.
On my side, I also like having separated scripts that can be reused, so I created a build.sh file in my repo. Be sure that your script can be executed by giving the right permissions.
#!/bin/sh

# Add Android SDK license in a default file
mkdir "${ANDROID_HOME}/licenses" || true
echo "8933bad161af4178b1185d1a37fbf41ea5269c55" > "${ANDROID_HOME}/licenses/android-sdk-license"

# Build the app
./gradlew assembleDebug
Here is my pipeline adding extra steps for my develop branch
# -----
# You can specify a custom docker image from Docker Hub as your build environment.
image: uber/android-build-environment:latest

pipelines:
  default:
    - step:
        script: # Modify the commands below to build your repository.
          - echo "Start default step"
          - ./build.sh
  develop: # target 'develop' branch only
    - step:
        script: # Modify the commands below to build your repository.
          - echo "Start develop step"
          - ./build.sh
          - echo "Amazing!"
What the purpose for specific steps here?
Let’s say that by default you want to be sure the app can still be build and run the test. You can do that by customizing your build.sh for that by updating Gradle command lines.
But then, once built and tested, for a specific branch, you can actually deploy it somewhere. That’s what we’re going to do with HockeyApp.
HockeyApp
HockeyApp is platform that let you distribute your iOS, Android, OS X and Windows apps to your testers. It’s a really nice solution for beta testing in a continuous delivery process. It also includes extra services like crash reporting, analytics and user feedback.
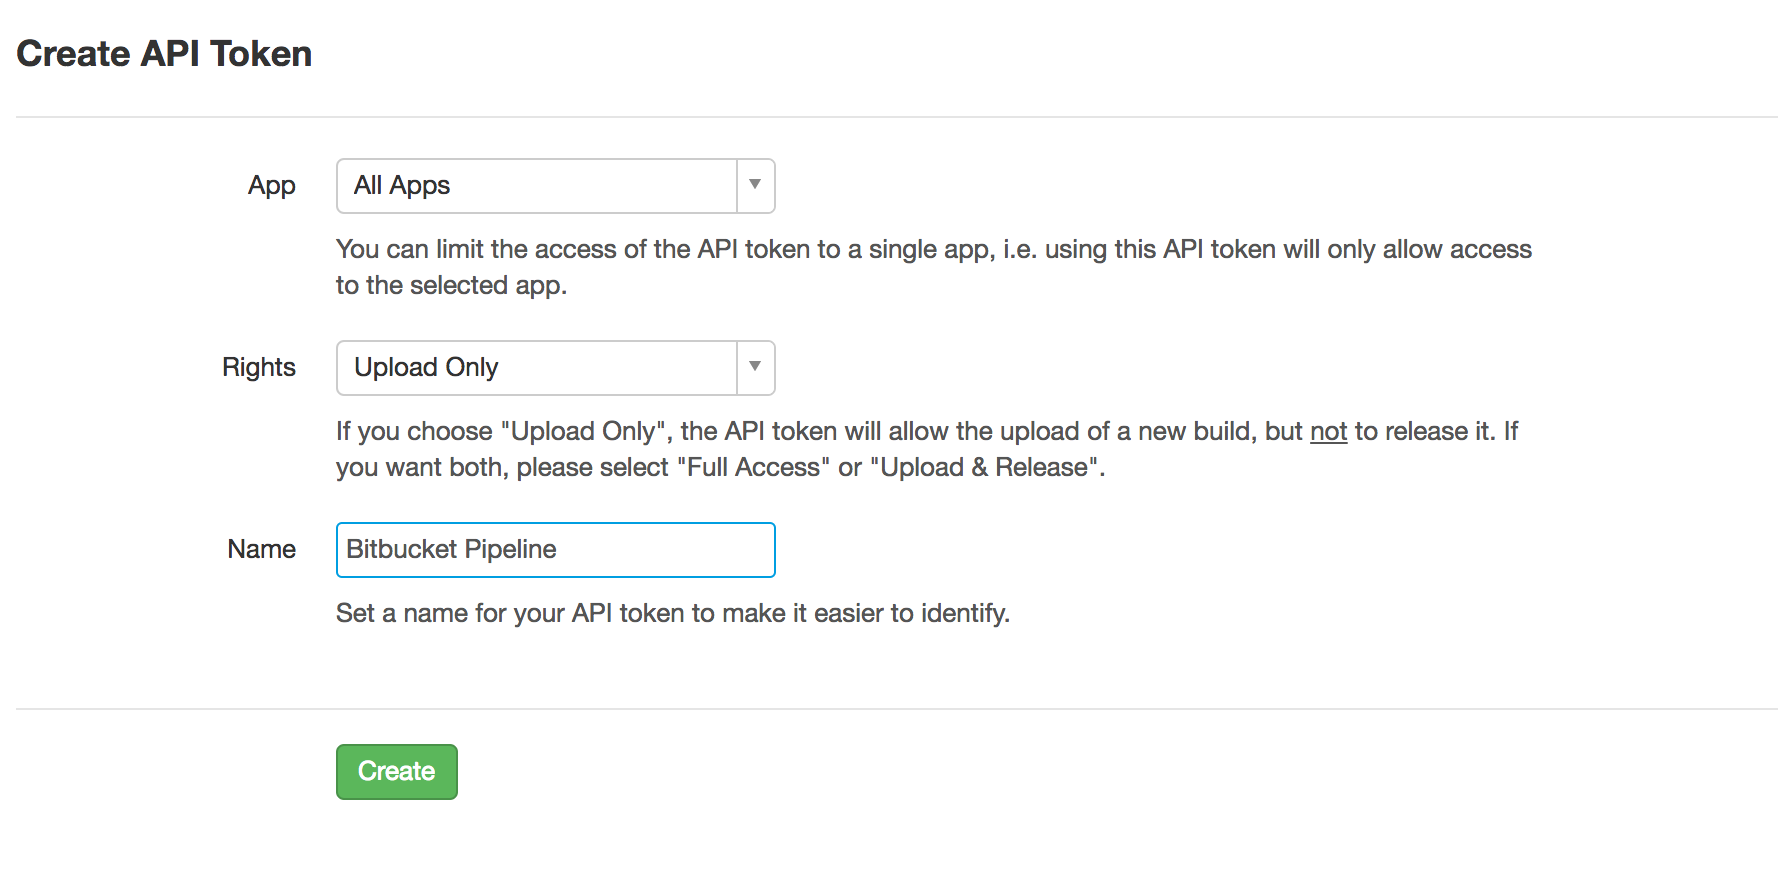
To use it with Bitbucket Pipeline, we need API access. Under your account settings > API Tokens, select your app and upload only rights to create your first API token. I would recommend you name it after Bitbucket Pipeline to make it clear for you (or your team).
Now let’s create a new script in your repository to upload an APK to HockeyApp. Here is my deploy-hockey-dev.sh
#!/bin/sh

# upload apk to hockey app
curl \
-F "status=2" \
-F "notify=0" \
-F "ipa=@app/build/outputs/apk/app-debug.apk" \
-H "X-HockeyAppToken: $HOCKEY_APP_TOKEN" \
https://rink.hockeyapp.net/api/2/apps/$HOCKEY_APP_ID/app_versions/upload
Here is the documentation For more info about Hockey App api. Here we allow to download the apk with status=2 but won’t notify user with notify=0. The ipa needs to point to the built apk previously. Finally, we’ll need the token previously created but also the app id that you can find on the main page on HockeyApp App.
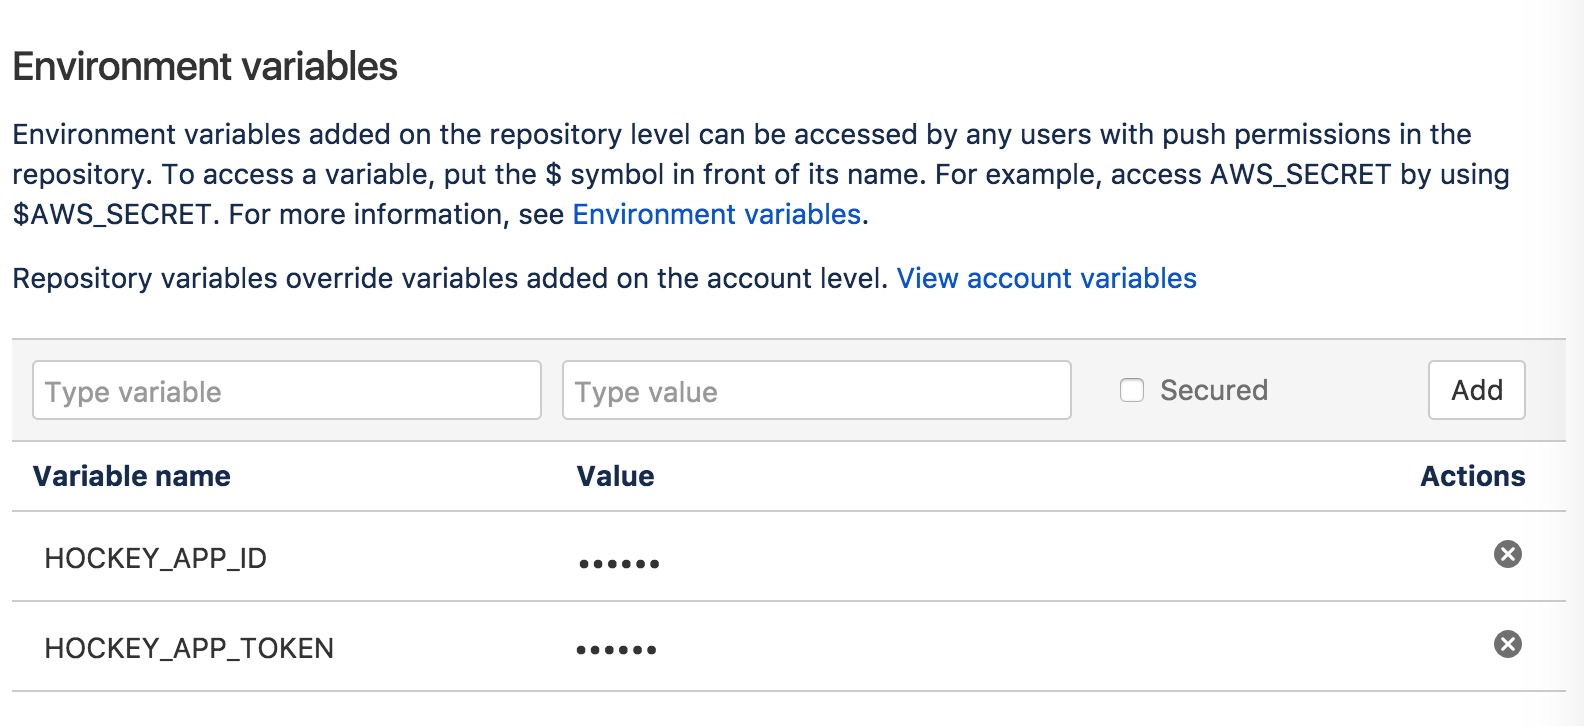
To avoid having your private token and app id in clear, let’s add them as Bitbucket Pipeline environment variables. On Bitbucket, under Settings > Pipeline > Environment variables, add each of your key there. Set as secure for your token to be sure it won’t be displayed in the shell.
Let’s finalize it by update our pipeline script.
# -----
# You can specify a custom docker image from Docker Hub as your build environment.
image: uber/android-build-environment:latest

pipelines:
  default:
    - step:
        script: # Modify the commands below to build your repository.
          - echo "Start default step"
          - ./build.sh
  develop: # target 'develop' branch only
    - step:
        script: # Modify the commands below to build your repository.
          - ./build.sh
          - ./deploy-hockey-dev.sh
Now, develop branch will be build and upload as a debug apk into HockeyApp for every pull request merged.
To go further
What if I want a release APK?
To be able to sign a release APK, you need a Android keystore and a passphrase. It’s not recommend to put the private key in your repository, specially for a public repo. However, if you so do, you can add passphrase as a variable environment to limit the risk.
Finally, this post gives you a quick introduction to what can be possible with Bitbucket Pipeline. Some extra steps might be required depending of the deployment environment, here the Docker image used, or you Android project itself, including Gradle wrapper property for instance.