Create a dynamic onboarding UI in Swift
When creating new features, it’s really important to think about how our users will use it. Most of the time, the UI is straightforward enough. However, sometimes, you will want to give some guidance, to highlight a button or a switch, with a message attached. Today, we’ll create a reusable and adaptable overlay in Swift to help onboard mobile users for any of your features.
Requirements
If you’re starting with onboarding journey, a good start to capture the essential and UX best practice is to look into dos and don’ts when creating one.
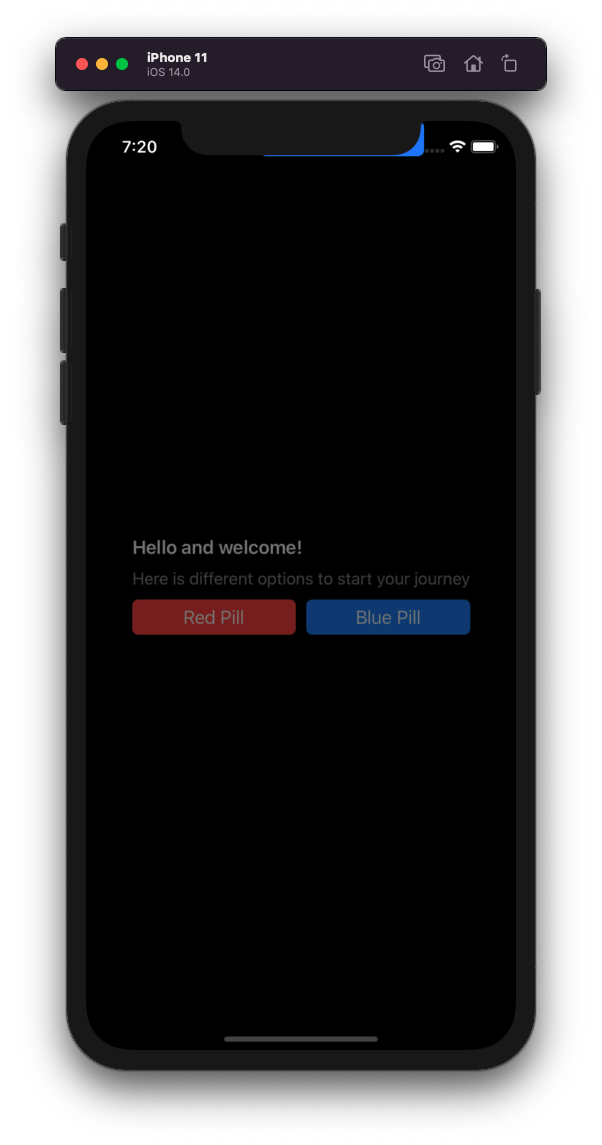
Essentially, we want to give the best user experience, giving enough information to the user without being in his way. In this aspect, one way to give some orientation is to display tooltips to understand better what’s going on. In this post, I’ll create one for this simple view.

Code
Since I want to create a UI component that will be reusable in the future, I can’t use images or any way with static content. If the copy of our buttons or the background color changed, it should still display correctly.
First thing first, let’s create a view for this new component. It should have an anchor, to point to the component it support (here the button), a background view for an overlay effect, and a title that would be display as a “bubble” above our button.
I also need two more functions, one to display the overlay and the hide it. I will add a tap gesture as well, so we know when the user interact with it.
class OverlayView: UIView {

    let title: String
    weak var anchorView: UIView?
    var onTap: (() -> Void)?

    init(title: String, anchorView: UIView?) {
        self.title = title
        super.init(frame: .zero)
        self.anchorView = anchorView
        setupViews()
    }

    required init?(coder: NSCoder) {
        fatalError("Not implemented")
    }

    override func awakeFromNib() {
        super.awakeFromNib()
        setupViews()
    }

    func setupViews() {
        alpha = 0

        // TODO
    }

    func showOverlay() {
        UIView.animate(withDuration: 0.6) {
            self.alpha = 1
        }
    }

    func hideOverlay(_ completion: ((Bool) -> Void)? = nil) {
        UIView.animate(withDuration: 0.6, animations: {
            self.alpha = 0
        }, completion: completion)
    }
}
Alright, we’ve got the foundation with some basic animation, but wait, it doesn’t include any UI yet. Let’s start by displaying the anchor.
So how exactly can we display the anchor view within the overlay?
We can’t just add it as subview, it would bring the action to it as well, and ideally we don’t want to mess around the first design, so they overlay can’t keep a strong reference to it.
We can’t either “copy” the object itself, if a UIView inherits from NSObject, the copy isn’t viable in that case and makes the app crash. Recreating the UIView and reassigning each property would be the best bet but it means we have to know what type of view it is, it’s not easy to reuse in our scalable effort.
But wait, we actually don’t need a copy of the object, only a copy of its display, and lucky us, there is a way to do it with UIView, taking a snapshot with UIView.snapshotView(afterScreenUpdates: Bool). Exactly what we need.
I’ll also add a container view for the bubble, an arrow to point out the anchor and a background view for the overlay. I’ll use lazy components and a layout constraint to align it all.
class OverlayView: UIView {
    // ... previous code

    lazy var titleLabel: UILabel = {
        let titleLabel = UILabel()
        titleLabel.font = UIFont.systemFont(ofSize: 12)
        titleLabel.text = title
        titleLabel.textColor = .label
        titleLabel.isHidden = title.isEmpty
        titleLabel.numberOfLines = 0
        titleLabel.translatesAutoresizingMaskIntoConstraints = false
        return titleLabel
    }()

    lazy var containerView: UIView = {
        let view = UIView()
        view.backgroundColor = .white
        view.layer.cornerRadius = 12
        view.translatesAutoresizingMaskIntoConstraints = false
        return view
    }()

    lazy var backgroundView: UIView = {
        let view = UIView()
        view.backgroundColor = .black
        view.alpha = 0.5
        view.translatesAutoresizingMaskIntoConstraints = false
        return view
    }()

    lazy var arrowImage: UIImageView = {
        let imageView = UIImageView(image: UIImage(named: "bottom-arrow"))
        imageView.contentMode = .scaleAspectFit
        imageView.translatesAutoresizingMaskIntoConstraints = false
        NSLayoutConstraint.activate([
            imageView.widthAnchor.constraint(equalToConstant: 24),
            imageView.heightAnchor.constraint(equalToConstant: 8),
        ])
        return imageView
    }()


    private func setupViews() {
        alpha = 0

        guard let anchorView = self.anchorView,
              let cloneView  = anchorView.snapshotView(afterScreenUpdates: false) else { return }

        cloneView.frame = anchorView.frame
        containerView.addSubview(titleLabel)

        addSubview(backgroundView)
        addSubview(cloneView)
        addSubview(arrowImage)
        addSubview(containerView)

        var constraints = [
            backgroundView.topAnchor.constraint(equalTo: topAnchor),
            backgroundView.leftAnchor.constraint(equalTo: leftAnchor),
            backgroundView.rightAnchor.constraint(equalTo: rightAnchor),
            backgroundView.bottomAnchor.constraint(equalTo: bottomAnchor),
            titleLabel.leftAnchor.constraint(equalTo: containerView.leftAnchor, constant: 12),
            titleLabel.topAnchor.constraint(equalTo: containerView.topAnchor, constant: 12),
            titleLabel.rightAnchor.constraint(equalTo: containerView.rightAnchor, constant: -12),
            titleLabel.bottomAnchor.constraint(equalTo: containerView.bottomAnchor, constant: -12),
            containerView.leftAnchor.constraint(equalTo: leftAnchor, constant: 12),
            containerView.rightAnchor.constraint(equalTo: rightAnchor, constant: -12),
            arrowImage.centerXAnchor.constraint(equalTo: cloneView.centerXAnchor),
            containerView.bottomAnchor.constraint(equalTo: cloneView.topAnchor, constant: -20),
            arrowImage.topAnchor.constraint(equalTo: containerView.bottomAnchor, constant: -1)
        ]

        NSLayoutConstraint.activate(constraints)
    }
}
Sounds good! However when launching, it’s not actually working. It’s pretty far from the initial button.
Thing is when taking a screenshot of our anchor, we also got its size and origin. However, that frame is based on it’s parent view, so we need to translate the origin point to our overlay to always work.
private func setupViews() {
    alpha = 0

    guard let anchorView = self.anchorView,
            let parentView = anchorView.superview,
            let cloneView  = anchorView.snapshotView(afterScreenUpdates: false) else { return }

    let translatedOrigin = parentView.convert(anchorView.frame.origin, to: self)
    cloneView.frame = CGRect(origin: translatedOrigin, size: anchorView.bounds.size)

    // ... previous code
}
Much better.
Finally we can add our missing tap gesture and wrap the implementation, so that any interaction would eventually dismiss it.
private func setupViews() {
    // ... previous code

    let tapGestureRecognizer = UITapGestureRecognizer(target: self, action: #selector(onTapGesture(_:)))
    addGestureRecognizer(tapGestureRecognizer)
}

@objc func onTapGesture(_ sender: Any) {
    onTap?()
}
Alright, last step, let’s zoom into the implementation into our ViewController.
class ViewController: UIViewController {
// ... other UI elements
override func viewDidAppear(_ animated: Bool) {
super.viewDidAppear(animated)
showFirstOverlay()
}
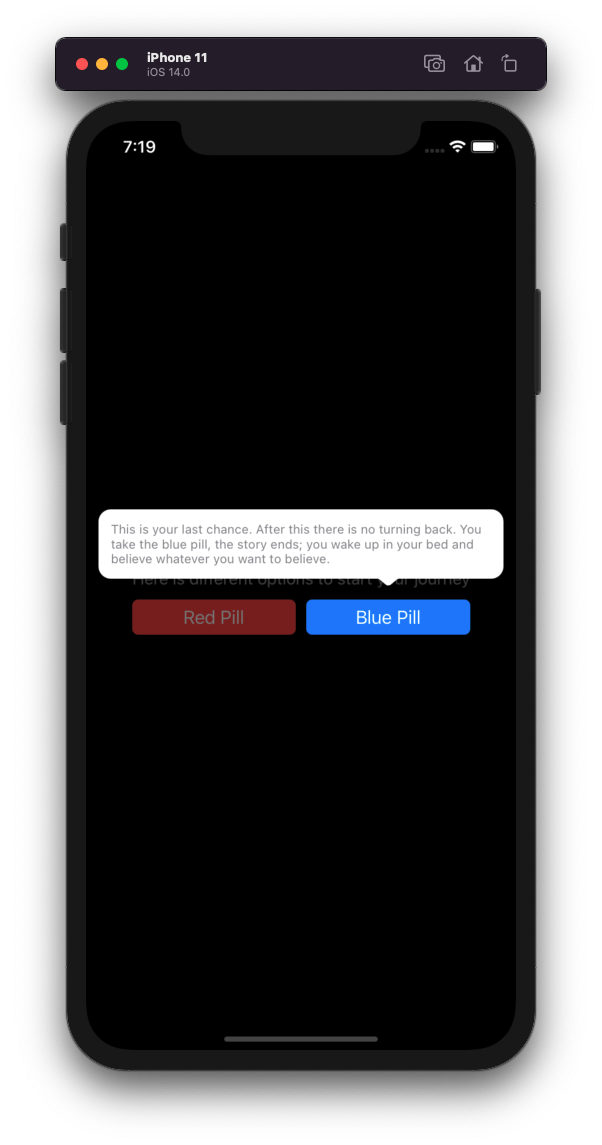
func showFirstOverlay() {
let overlayView = OverlayView(title: "This is your last chance. After this there is no turning back. You take the blue pill, the story ends; you wake up in your bed and believe whatever you want to believe.", anchorView: blueButton)
overlayView.frame = view.frame
view.addSubview(overlayView)
overlayView.onTap = { [weak self, weak overlayView] in
overlayView?.hideOverlay { _ in
overlayView?.removeFromSuperview()
self?.showSecondOverlay()
}
}
overlayView.showOverlay()
}
func showSecondOverlay() {
let overlayView = OverlayView(title: "You take the red pill, you stay in Wonderland and I show you how deep the rabbit hole goes.", anchorView: redButton)
overlayView.frame = view.frame
view.addSubview(overlayView)
overlayView.onTap = { [weak overlayView] in
overlayView?.hideOverlay { _ in
overlayView?.removeFromSuperview()
}
}
overlayView.showOverlay()
}
}
Since I programmatically add the overlay, I also set the frame matching to the presenter’s one, so it takes all the screen. I also use viewDidAppear to make sure that everything is rendered first, a snapshot of a UIView earlier wouldn’t work.
Finally, I chained the overlay to firstly present the blue button, then the red button once the user has interacted with. I’ll make sure to remove the overlay before moving forward.
Here out it looks when completed.
Awesome, our overlay is easily reusable to create a smooth onboarding for our new coming feature. Could we do better though?
Improvements and limitations
There are couple of improvements I could think of to make it even more reusable.
At the moment, the direction of the “bubble” is always above the anchor, this wouldn’t work if it’s to close to the top. Ideally we want the overlay to adapt to its environment and eventually display below the anchor if the frame doesn’t have space above.
We could also set a timer configuration to have better control over transitions and time animation, it’s hardcoded at the moment. The timing is also not it’s best, we could wait for user to start interacting before showing it.
At the same time, the ViewController owns the flow, so there is still change to miss removing the overlay view, or start stacking them by mistake. Since it’s relies on closures, it’s also important to keep an eye on weak and strong reference.
Finally, if another subview was presenting the overlay, it wouldn’t work either, the frame would be limited to its own container view. So if it works here, having too many subviews might tend to limit the options.
In conclusion, we’ve seen how to create a simple overlay view to create a reusable and dynamic component that is a great fit for onboarding journeys.
It’s discrete enough to help mobile users found their way without being too pushy to the next step forward. That’s what makes a good mobile user experience.
This sample is available on my Github below OverlaySample project.
Happy coding.