RxSwift & MVVM - Advanced concepts of UITableView with RxDataSources
For the past months, I keep going further in RxSwift usage. I really like the idea of forwarding events through different layers but the user interface stays sometimes a challenge. Today, I’ll describe how to use RxDataSources to keep things as easy as possible.
If you aren’t familiar with reactive programming, I would suggest to start here. The code structure today is based on a MVVM pattern paired with RxSwift that I have previously done.
With reactive code, it’s sometimes hard to find how to get access to specific properties and capabilities that UIKit offers. We might be tempted to take some shortcuts and re-implement delegate from scratch and loosing at the same time the reactivity of the element.
That might be something you already experienced with UITableView. It was maybe when looking for a sectionHeader or creating a sectionIndex or try to edit different cells. But here comes RxDataSources, a reactive datasource component giving all the usage we know of UITableViewDataSource fully reactive.
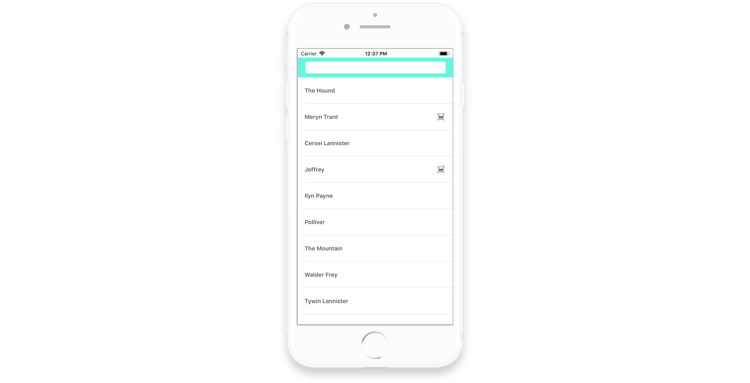
In those time of Game of Thrones, I’m going to build a Killer app for Arya. It will keep track of name on her target list. It’s going to be a basic UITableView with a search field to filter out names faster, fully written with RxSwift and following MVVM pattern.
Here is my ViewModel to start with.
struct ViewModel {
    let input: Input
    let output: Output

    struct Input {
        let search: PublishRelay<String>
    }

    struct Output {
        let targets: Driver<[Target]>
    }

    init(targets: [Target] = []) {

        let targetSubject = PublishRelay<[Target]>()
        let searchSubject = PublishRelay<String>()

        let targets = searchSubject
            .startWith("")
            .distinctUntilChanged()
            .withLatestFrom(targetSubject.startWith(targets).asObservable()) { (search, targets) in (search, targets)}
            .map({ (search, targets) -> [Target] in
                return targets.filter({ $0.name.hasPrefix(search) || $0.name.contains(" \(search)") })
            })
            .asDriver(onErrorJustReturn: [])

        self.input = Input(search: searchSubject)
        self.output = Output(targets: targets)
    }
}
The biggest logic relies into the targets observable. Based on the latest search request and the targets available in the list, I will filter matching targets by name.
And the reactive side of my ViewController.
class ViewController: UIViewController {
    // ...

    private func bindViews(to viewModel: ViewModel) {

        // binding viewmodel targets to the tableview
        viewModel.output.targets
            .drive(tableView.rx.items(cellIdentifier: "TargetCell", cellType: TargetCell.self)) { (_, target, cell) in
                cell.currentTarget = target
            }
            .disposed(by: disposeBag)

        // binding entry search to viewmodel
        searchField.rx.text
            .orEmpty
            .throttle(0.5, scheduler: MainScheduler.instance)
            .distinctUntilChanged()
            .bind(to: viewModel.input.search)
            .disposed(by: disposeBag)
    }
}
However, the list getting longer and longer over the series, it would be better to have a section index on the side as well as section header. That’s where RxCocoa has some limits. So we’ll use RxDataSources for that.
RxDataSources
Like the Rx suite, RxDataSources is available via CocoaPods and Carthage.
The main different is to use a separated datasource for our tableView. Our elements will be forward to the datasource which will handle the tableView on its own, but first we need to create a section for it.
struct TargetSection {
    var header: String
    var items: [Target]
}

extension TargetSection: SectionModelType {
    typealias Item = Target
    init(original: TargetSection, items: [Item]) {
        self = original
        self.items = items
    }
}
Then we need to update the ViewModel to keep track of section of Target instead of Target only.
let sections = searchSubject
    .startWith("")
    .distinctUntilChanged()
    .withLatestFrom(targetSubject.startWith(targets).asObservable()) { (search, targets) in (search, targets)}
    .map({ (search, targets) -> [Target] in
        return targets.filter({ $0.name.hasPrefix(search) || $0.name.contains(" \(search)") })
    })
    .map({ $0.sorted(by: { $0.name.localizedCaseInsensitiveCompare($1.name) == .orderedAscending }) })
    .map({ targets -> [TargetSection] in
        var sections: [TargetSection] = []

        targets.forEach({ target in
            // getting first letter
            let header: String = "\(target.name.first ?? "#")".uppercased()
            if let index = sections.index(where: { $0.header == header }) {
                sections[index].items.append(target)
            } else {
                let section = TargetSection(header: header, items: [target])
                sections.append(section)
            }
        })

        return sections
    })
    .asDriver(onErrorJustReturn: [])
This might be quite tricky to read. so let’s walk through it together.
- First part is to receive the search content being tapped. That’s our entry point.
- First
map({ })hasn’t changed, we filter the target based on that research. - Second
map({ })is to order the result alphabetically ascending. - Third
map({ })is designed to create sections based on our sorted filtered result.
I preferred created 3 maps instead of one to describe each step and give more readability but looking at it now, that can be questionable.
Finally we need to update our ViewController to use those section now.
class ViewController: UIViewController {
    // ...

    lazy var dataSource: RxTableViewSectionedReloadDataSource<TargetSection> = {
        let dataSource = RxTableViewSectionedReloadDataSource<TargetSection>(configureCell: { (_, tableView, indexPath, target) -> UITableViewCell in

            let cell = tableView.dequeueReusableCell(withIdentifier: "TargetCell", for: indexPath) as! TargetCell
            cell.currentTarget = target
            return cell
        })
        return dataSource
    }()

    private func bindViews(to viewModel: ViewModel) {

        viewModel.output.sections
            .drive(tableView.rx.items(dataSource: dataSource))
            .disposed(by: disposeBag)

        searchField.rx.text
            .orEmpty
            .throttle(0.5, scheduler: MainScheduler.instance)
            .distinctUntilChanged()
            .bind(to: viewModel.input.search)
            .disposed(by: disposeBag)
    }
}
Now, our output sections go straight to the datasource which populates the tableView. I kept a lazy datasource for configuration.
If you build it, you won’t see any difference yet. That’s expected, we just moved from our first binding to use RxDataSources one.
But now we can add some missing options straight from our lazy load. For instance, we can also put the cell editable to note which target is off the list. Of course, only alive target would be editable.
dataSource.canEditRowAtIndexPath = { dataSource, indexPath in
    return dataSource.sectionModels[indexPath.section].items[indexPath.row].isDead
}
Let’s also add section index as well as index to create a shortcut.
dataSource.titleForHeaderInSection = { dataSource, index in
    dataSource.sectionModels[index].header
}

dataSource.sectionIndexTitles = { dataSource in
    dataSource.sectionModels.map({ $0.header })
}
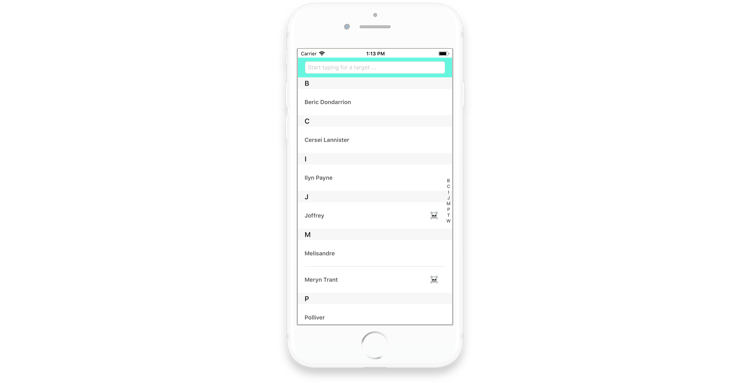
Much better! We can make many more improvements but you’ve got the idea. We took advantage of our reactive code and easily implement more advanced UITableView features using RxDataSources.
In conclusion, we’ve seen how to keep our codebase reactive with without taking shortcuts to implement native features from UIKit. It can looks like some limitations to the Reactive world when it comes to those features to yet fully implementation. However, it’s very important to keep in mind that RxSwift is open source, so anybody can contribute to whatever is missing, like RxDataSources did.
Happy Coding